
Hi Everyone,
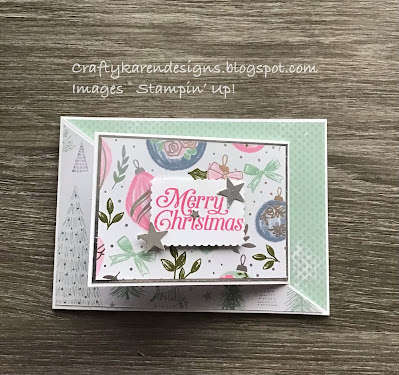
Today I am CASEing a project that I saw Susan Campfield and Rachel Tessman make this last week (both US Stampin' Up Demonstrators). As you know, I love a fun fold and joy fold cards are great but this is a bit of a spin on the regular joy fold and I really liked it. My measurements are adapted for UK A4 size, let me show you how to make it.
Materials
1 piece of thick basic white card stock 4 1/8" x 11 3/4" (A4 sheet cut in half lengthways), 1 piece 8 1/4" x 3", scrap for the sentiment
1 piece of dsp 5 3/4" x 4", 1 piece 5 5/8" x 3 7/8", 1 piece 3 3/4" x 2 3/4"
1 piece of silver foil 3 7/8" x 2 7/8", scraps for the stars
Perfectly Plaid stamp set
Polished Pink ink
Rectangle Postage Stamp Punch
Starlit Punch
Trimmer
Simply Scored
Bone folder
Multipurpose adhesive
Dimensionals
Instructions
On the long side, score the thick basic white card at 5 7/8" and fold and burnish to make the card base.
Put the card in the trimmer and make a diagonal cut from the outer edge to the score line as shown in the picture. When you look at the finished card, this will be top left to bottom right.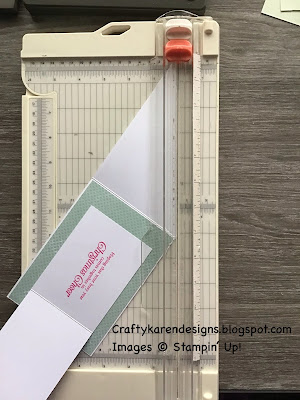
Cut the largest piece of dsp in the same way, diagonally to fit that remaining piece of card front, if the pattern is directional, make sure you are cutting it the right way (you don't want upside down trees), you can use the left over piece for another card. Adhere this piece to the card front and add the larger piece of dsp to the inside of the card.
Score the smaller piece of basic white card at 4 1/8" and fold and burnish, remember that this piece will open the opposite way to your diagonal cut card. Add the silver foil mat and then the dsp to this smaller card front.
Stamp a sentiment on the inside of the smaller card and one on a scrap and then punch that one out with the postage stamp punch.
Adhere the smaller card to the inside of the diagonal one so that they fold over each other and open in opposite directions (see picture).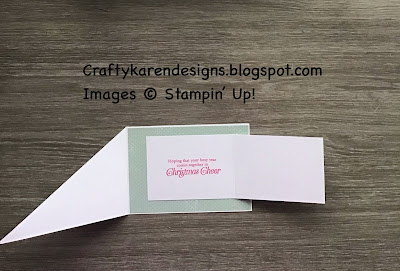
Add the sentiment for the front to the centre of the smaller card using dimensionals. Punch out some small stars with the punch and add to the sentiment label.

I hope that you like this pretty card and will give it a try. If you want to see the originals, just pop over to YouTube and look for Susan Campfield and Rachel Tessman, they both have lots of fabulous projects.
If you would like to see more of my Blog Posts, sign up on the pop up form and you will get my weekly Newsletter with all the details of my latest projects and news from Stampin' Up!
If you would like to join my Team or become one of my Discount Shoppers, you can message me on my Facebook Page at www.facebook.com/craftykarendesigns or via the Contact Me box below this Blog.
If you are interested in taking part in some challenges and having crafty chats with like minded people and a bit of a laugh, pop over to Craft and Banter on Facebook (link in the side bar), we would love your company.
If you are interested in taking part in some challenges and having crafty chats with like minded people and a bit of a laugh, pop over to Craft and Banter on Facebook (link in the side bar), we would love your company.
Happy crafting,
Karen X


 Specialty Designer Series Paper")


")


A really pretty card and I love the fold too xx
ReplyDelete