Thursday 25 April 2019

Pop Up Butterfly Card

Hi Everyone,

Today I am bringing you a card with a pop up on the inside.  The original inspiration came from Mixed Up Crafts but I have used the template and adapted it to my design.  I've used some old favourites (gingham and butterflies) but also I'm introducing a beautiful new stamp set (with matching punch) Floral Essence from the 2019 Stampin'Up! catalogue.

Materials

1 x 7" x 10" card for the base (I've used white but you could use a coloured piece)
1 x 9 3/4" x 6 3/4" piece of white card for the pop up mechanism inside
1 x 4 3/4" x 6 3/4" highland heather card for the front mat
1 x 4" x 6" gingham gala in highland heather for the dsp layer
1 x 3 1/2 x 5" white for the stamping layer
Scraps of white for the butterflies and leaves
Scrap of highland heather for the flower
Ink pads to match (I've used highland heather, lemon lime twist, balmy blue, grapefruit grove)
Butterfly Gala stamp set
Floral Essence stamp set
Butterfly duet punch
Perennial Flower punch
Leaf punch
Multipurpose adhesive
Dimensionals
Clear blocks
Trimmer
Bone folder

Instructions

Cut the card base to 7" x 10" (or use a pre bought card base)

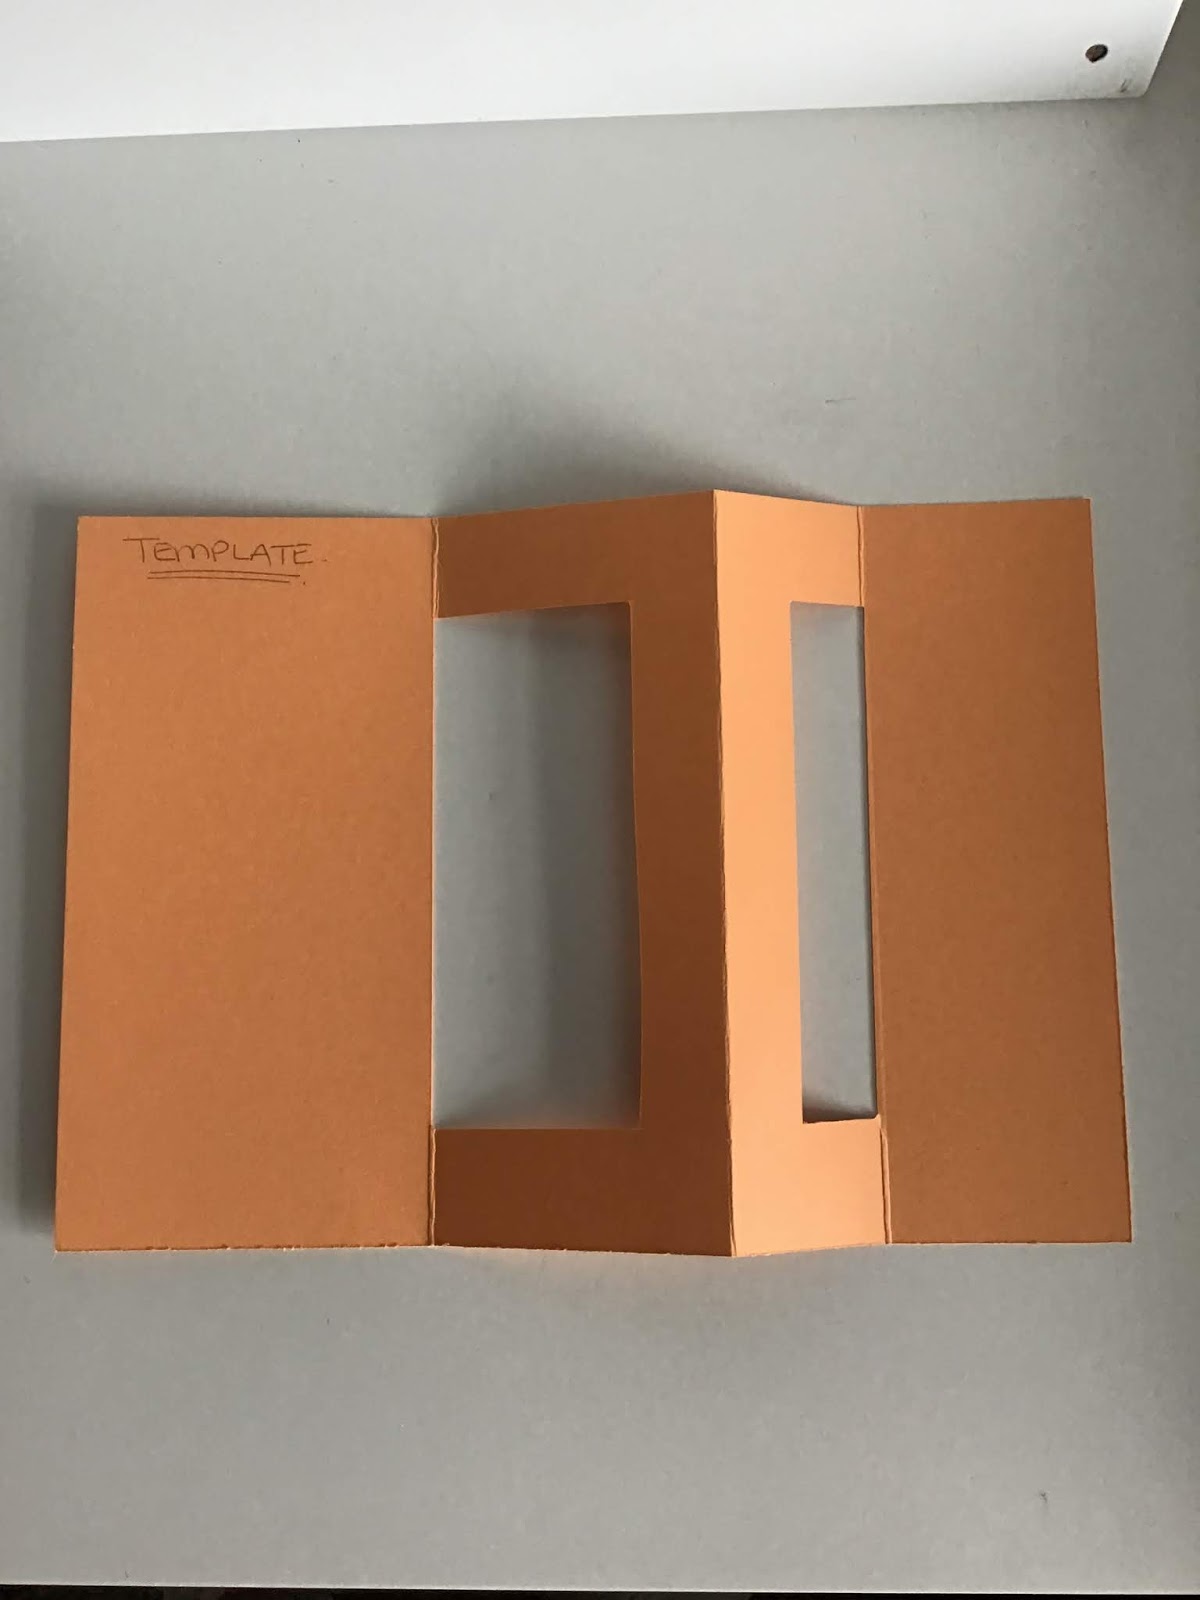
Cut a piece of white card to 9 3/4" x 6 3/4" and score on the long side at 2 1/8" and 6 3/8" and then flip the card over and score at 3 5/8"

Measure 1" from the top down the score lines and 1" up from the bottom and make a mark across all the score lines. Then measure out 3/4" on both sides of the middle score line and make a mark at the top and the bottom of the card. Then join the lines together as shown in the template and carefully cut away the two sections on either side of the middle scoreline.  The middle section is the piece that all of the cut outs will be adhered to. I've used coloured card on this sample to try and make it stand out for you.


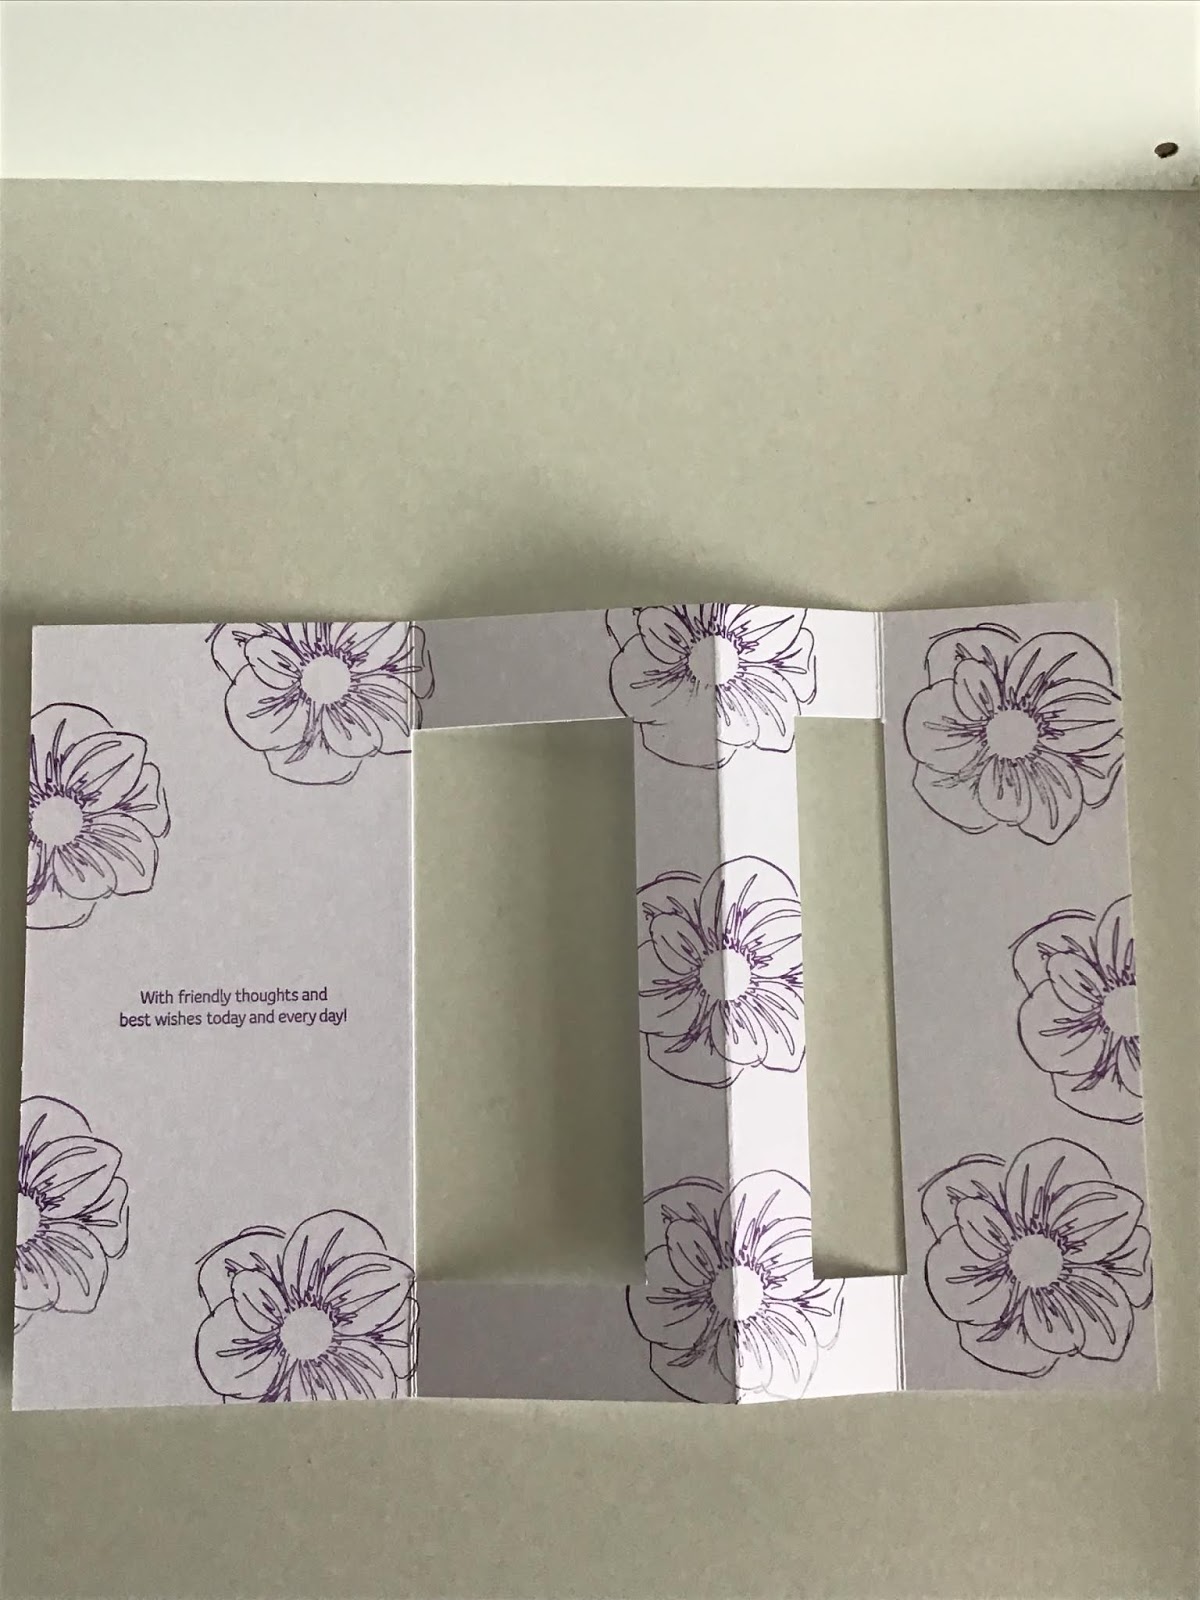
Then using the largest flower from the Floral Essence set, I have randomly stamped all over this piece and added a sentiment to the left hand side.

Then stamp several sets of butterflies in colours of your choice and punch them out.  I have glued the small butterflies to the centre of the large ones to give them some dimension.


Adhere the pop up layer to the inside of the card base, lay it flat and make sure that there is a border all around, add glue to the larger right and left hand sections only and stick down. Test the mechanism is working and that the card will fold correctly.

Decorate the centre piece with your cut out butterflies. I have stuck them down with dimensionals and popped up the wings on the smaller butterflies.

On the stamping layer I have stamped the same floral image on the top left and bottom right and added a sentiment in the middle.  I have then stamped the image that matches the perennial flower punch twice in highland heather ink on highland heather card and punched them out.  Adhere one on top of the other to make a flower.  Then stamp two leaf images and punch out with the leaf punch.  Put a dimensional on the back of the flower and catch the two leaf images to that before you stick it on the stamped image on the front layer.  Layer up the front pieces as shown below and adhere to the front of the card.
Beautiful card incorporating some of my old favourites with a new one, I hope that you like it and give it a try.

You will be able to order the new items from the beginning of June so pop over to my shop if you are interested.  In the meantime, you can make this card using a different stamp set, different colours, different punches, the opportunities are endless.

Happy Crafting


Karen XX

Product List

Monday 15 April 2019

Tiny gift bag

Hi Everyone,


For my general swaps at On Stage, Telford, I made these tiny gift bags, decorated them and put a tea light inside.  Hope you like them.

Materials

1 x dsp 5 3/4" x 3"
Scrap of silver foil
Scrap of whisper white for the sentiment
Tint scrap of contrasting coloured card for the flowers
Rhinestones
Small piece of ribbon to tie the bag
1" circle punch
1 3/8" circle punch
1/8" hand held circle punch
Bitty Bloom punch
Glue
Dimensionals
Tea light
Bone folder

Instructions

Score the dsp on the long side at 3/4", 2 1/2", 3 1/4", 5"
Turn and score on the short side at 3/4"
Fold and burnish all the score lines.
On the long side cut up all of the small score lines to make tabs and remove the one on the left hand end (see picture).


Add some glue to the long tab on the left hand side and then fold to make a box shape. Fold in the small tabs on the base and then glue the larger tabs over the top to close the bottom of the bag.
Push in on the side to close the top of the box and using the 1/8" punch, punch one hole in the centre at the top to thread the ribbon through.


Stamp the sentiment on the 1" circle and adhere to the silver foil circle with a dimensional. 
Punch out two flowers with the  bitty bloom punch and put a rhinestone in the centre of each, then glue them to the stamped circle to decorate. Add a dimensional to the back of the foil and stick to the front of the bag.

Add a tealight and thread the ribbon through the holes at the top and tie in a bow.


My grandaughter Amy made this sample today to show you how easy it is.

Happy crafting

Karen xx


Product List

Diamond Top Card

Hi Everyone,

I'm just back from On Stage 2019 in Telford where I got a sneaky peek at some of the new products in the catalogue, caught up with some old friends and made some new ones too.  I took part in a team training day yesterday where I showed some of my fellow team mates how to make this card. Give it a go, its much easier than it looks.


Materials

1 x A4 sheet of coloured card stock
1 x A4 sheet of whisper white card stock for mats and sentiment
2 x sheets of 6 x 6 designer series paper (Garden Impressions), preferably not one with a directional pattern
Amazing Life  Stamp Set
Ink to match
Glue
Dimensionals

Instructions

Score the coloured card in half down the length at 4 1/8", then turn on to the long side and score again at 4 1/8", your sheet will now have two 4 1/8" squares at the top and then two rectangles below, fold and burnish the score lines.

Measure down the centre score line to 5 1/2" and make a small pencil mark, then measure down the two long edges of the card to 7 1/4" and make a pencil mark.

Then make a diagonal score from the centre point at 5 1/2" to the outer points at 7 1/4" (see picture)
Hold the card in front of you with the two squares at the top and bend the diagonal scorelines away from you gently to start them off. Then bring the top piece of card (with the two squares) towards you and gently start to push the bottom sections of the card closed. The top should all then fold in and make the diamond shape at the top.

Gently burnish over the folds to keep them in place, your card should now look like the picture at the top but without any decoration.

Cut two pieces of whisper white card stock at 5 7/8" x 3 7/8", then measure up from the bottom 
4 1/4" on the right hand side of this piece and make a mark. Join the mark diagonally to the left hand top of the piece and cut (see picture below).

Cut a piece of dsp in the same way but measuring 5 5/8" x 3 5/8", measure up from the bottom on the right hand side to 4", join to the top left and cut away the diagonal piece.

Adhere the dsp layer to the whisper white mat and glue to the front of the card.

Stamp a sentiment on the other whisper white piece of this size and adhere to the inside of the card.

For the top of the card, cut a piece of whisper white to 3 7/8" square and a smaller one at 3" square.


Cut a piece of matching dsp to 3 5/8" square which will go in between the two white layers. Remember that this piece will be displayed as a diamond shape, so I would recommend that you don't use a directional pattern.

Stamp the sentiment on the smaller whisper white piece, again remembering that this will be displayed as a diamond shape so line it up as it will look on the card before you stamp it.

Adhere the larger white square to the diamond top and glue the dsp layer on to that. Then put dimensionals on the back of the stamped layer and adhere to the front in the centre of the diamond.

I hope you enjoy making this card, I'd love to see pictures of them.

Happy stamping,

Karen XX


Product List