Tuesday 30 November 2021

Whimsy & Wonder Delicate Baubles Tri-Fold Panel Card

 Hi Everyone,


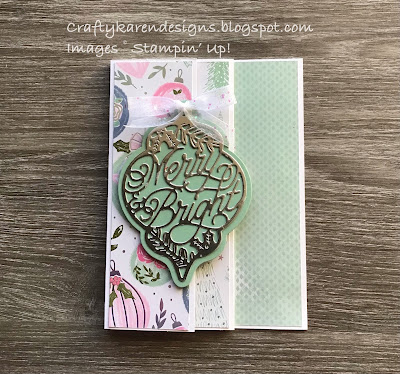
Today I have made a tri-fold panel card using the very pretty Whimsy & Wonder dsp and the gorgeous Delicate Baubles dies. It's another great way of showing off lots of dsp and/or using up scraps. Let me show you how I made it.

Materials

1 piece of thick white card 5 3/4" x 11 3/4" (full length A4)
Scrap of mint macaron and silver foil for die cutting bauble
1 piece of dsp 4 x 5 5/8", 3 pieces 2 1/2" x 5 5/8", 2 pieces 1 3/4" x 5 5/8"
Scrap of Glittered Organdy Ribbon
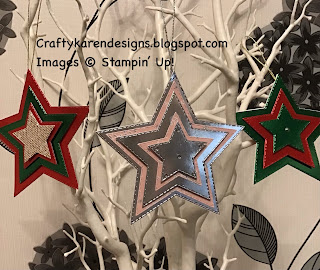
Detailed Bauble dies
Stampin' Cut & Emboss machine
Trimmer
Simply Scored
Bone Folder
Multipurpose adhesive
Dimensionals
Mini glue dots

Instructions

On the long side score the thick white card at 4 1/4", 7" and 9 3/4" and fold and burnish to score lines to form the card base.

Add the dsp layers to the panels.


Die cut the solid bauble from the mint macaron card and the detailed bauble using the silver foil.

Adhere the silver foil bauble on to the solid one and add to the front panel using dimensionals on just the left hand side.

Tie a bow with the ribbon and attach with glue dots to the top of the bauble,

I do hope that you like my card and will give it a try.

If you would like to see more of my Blog Posts, sign up on the pop up form and you will get my weekly Newsletter with all the details of my latest projects and news from Stampin' Up!

If you would like to join my Team or become one of my Discount Shoppers, you can message me on my Facebook Page at www.facebook.com/craftykarendesigns or via the Contact Me box below this Blog.

If you are interested in taking part in some challenges and having crafty chats with like minded people and a bit of a laugh, pop over to Craft and Banter on Facebook (link in the side bar), we would love your company.

Happy crafting,


Karen X


Product List

Saturday 27 November 2021

Stars for the Christmas Tree - Ink, Stamp, Share Blog Hop

 Hi Everyone,


Today I am hopping with the Ink, Stamp, Share group and the theme is 'Tree Decorations'. I have made a really simple, shiny star with lots of layers, it's really easy to make and takes no time at all, just what we need at this time of the year. It's simple enough to get the children involved too. Let me show you how I made them.

Materials

Scraps of foil in colours to match your decor (red, green, silver, gold)
Scraps of Christmas dsp (Whimsy & Wonder)
Stitched star dies (or any that you have, mine are very old)
Stampin' Cut & Emboss machine
Rhinestones
Dimensionals
Elegant Trim
Tear and Tape

Instructions

Die cut lots of stars in all of the sizes that you have in the colours that you want for your tree. I have only done a couple of examples, two in red and green and one using silver and dsp but the combinations are endless.

What I have done with the red/green ones is alternate the layers between the red and green on each side, each layer is the opposite of the one on the reverse. Two largest, 1 red, 1 green etc through the sizes. The set of dies that I have has 7 sizes so I cut each size in both colours.

The largest one has 4 layers on each side finishing with a gold sparkly one. The smaller one just has 3 layers on each side but alternating colours as the other one. On these two, I have used dimensionals on each layer to give lots of dimension.

The third one I have used silver foil and Whimsy and Wonder dsp and there are 5 layers of each side. The dsp layers I have glued and the foil layers I added with dimensionals.

Layer up each side and then on the reverse of one of them using tear and tape, fix the ends of the trim for hanging it on the tree and then add glue to the whole thing and sandwich the layers together. I clipped the top together with a bulldof clip for 5 minutes to make sure the top where the trim comes it is really secure.

Add rhinestones or other embellishments as you like.


Please click on the Next button and see what Kirsty has made and then pop over and see what everyone else has made too, I'm sure there will be loads of great inspiration.


If you would like to see more of my Blog Posts, sign up on the pop up form and you will get my weekly Newsletter with all the details of my latest projects and news from Stampin' Up!

If you would like to join my Team or become one of my Discount Shoppers, you can message me on my Facebook Page at www.facebook.com/craftykarendesigns or via the Contact Me box below this Blog.

If you are interested in taking part in some challenges and having crafty chats with like minded people and a bit of a laugh, pop over to Craft and Banter on Facebook (link in the side bar), we would love your company.

Happy crafting,


Karen X


Product List

Flowers of Friendship Thank You Card - Birds Showcase Blog Hop

 Hi Everyone,


Today I have been colouring - not something I often do but I thought it was time to get out of my comfort zone and try some watercolour pencils with the Flowers of Friendship bundle. Let me show you what I did.

Materials

1 piece of just jade card stock 5 7/8" x 8 1/4", scrap for the sentiment mat
2 pieces of basic white 3 7/8" x 5 5/8" and a scrap for the sentiment, scraps for stamping flowers
Flowers of Friendship stamp set
Flowers & Leaves Punch
Watercolour Pencils
Blender Pens
Pretty Flowers Embossing Folder
Stitched Rectangle dies
Stampin' Cut & Emboss Machine
Trimmer
Simply Scored
Bone Folder
Multipurpose adhesive
Dimensionals
Memento Black ink

Instructions

On the long side score the just jade card at 4 1/8" and fold and burnish to make the card base.

Run one piece of the basic white through the Cut & Emboss machine in the Pretty Flowers embossing folder and then adhere to the card front.  

Using watercolour pencils, colour in a selection of flowers in both sizes and then go over them with the blender pen to give them the watercolour wash and even out the colouring.  Arrange them across the width of the card, adding the smaller ones on dimensionals.

Stamp the sentiment for the front on a scrap and die cut with the smallest of the stitched rectangles and layer up on the next size cut out in just jade.  Add to the card front at the bottom right.

Stamp a sentiment on the remaining piece of basic white and adhere to the inside of the card and add another couple of coloured in flowers.

I hope you like my pretty card, please pop over and see what the rest of the team have been up to, Tracy is up next


If you would like to see more of my Blog Posts, sign up on the pop up form and you will get my weekly Newsletter with all the details of my latest projects and news from Stampin' Up!

If you would like to join my Team or become one of my Discount Shoppers, you can message me on my Facebook Page at www.facebook.com/craftykarendesigns or via the Contact Me box below this Blog.

If you are interested in taking part in some challenges and having crafty chats with like minded people and a bit of a laugh, pop over to Craft and Banter on Facebook (link in the side bar), we would love your company.

Happy crafting,


Karen X


Product List