
Hi Everyone,

Welcome to my Fun Fold Friday series and this week I have made a Tri Fold Shutter Card showcasing the fabulous Snowflake Splendour designer series paper. There is a video tutorial over on my YouTube channel, just click on the link below:
Materials
1 piece of pacific point card stock 6" x 12"
Silver foil - 2 pieces 1 7/8" x 5 7/8", 2 pieces 1 7/8" x 2 7/8", 4 pieces 1 7/8" x 1 3/8", 2 pieces 3 7/8" x 1 3/8", 1 piece 3 7/8" x 2 7/8"
DSP - 2 pieces 1 3/4" x 5 3/4", 2 pieces 1 3/4" x 2 3/4", 4 pieces 1 3/4" x 1 1/4", 2 pieces 3 3/4" x 1 1/4"
2 pieces of whisper white 3 3/4" x 2 3/4" (additional one same size for the back of the card for your message if required)
Scraps of balmy blue glimmer paper
Stitched so sweetly dies
Stampin Cut and Emboss machine
Pine Tree punch
Perfectly Plaid stamp set
Pacific point ink
Snowflake sequins
Dimensionals
Multipurpose adhesive
Instructions
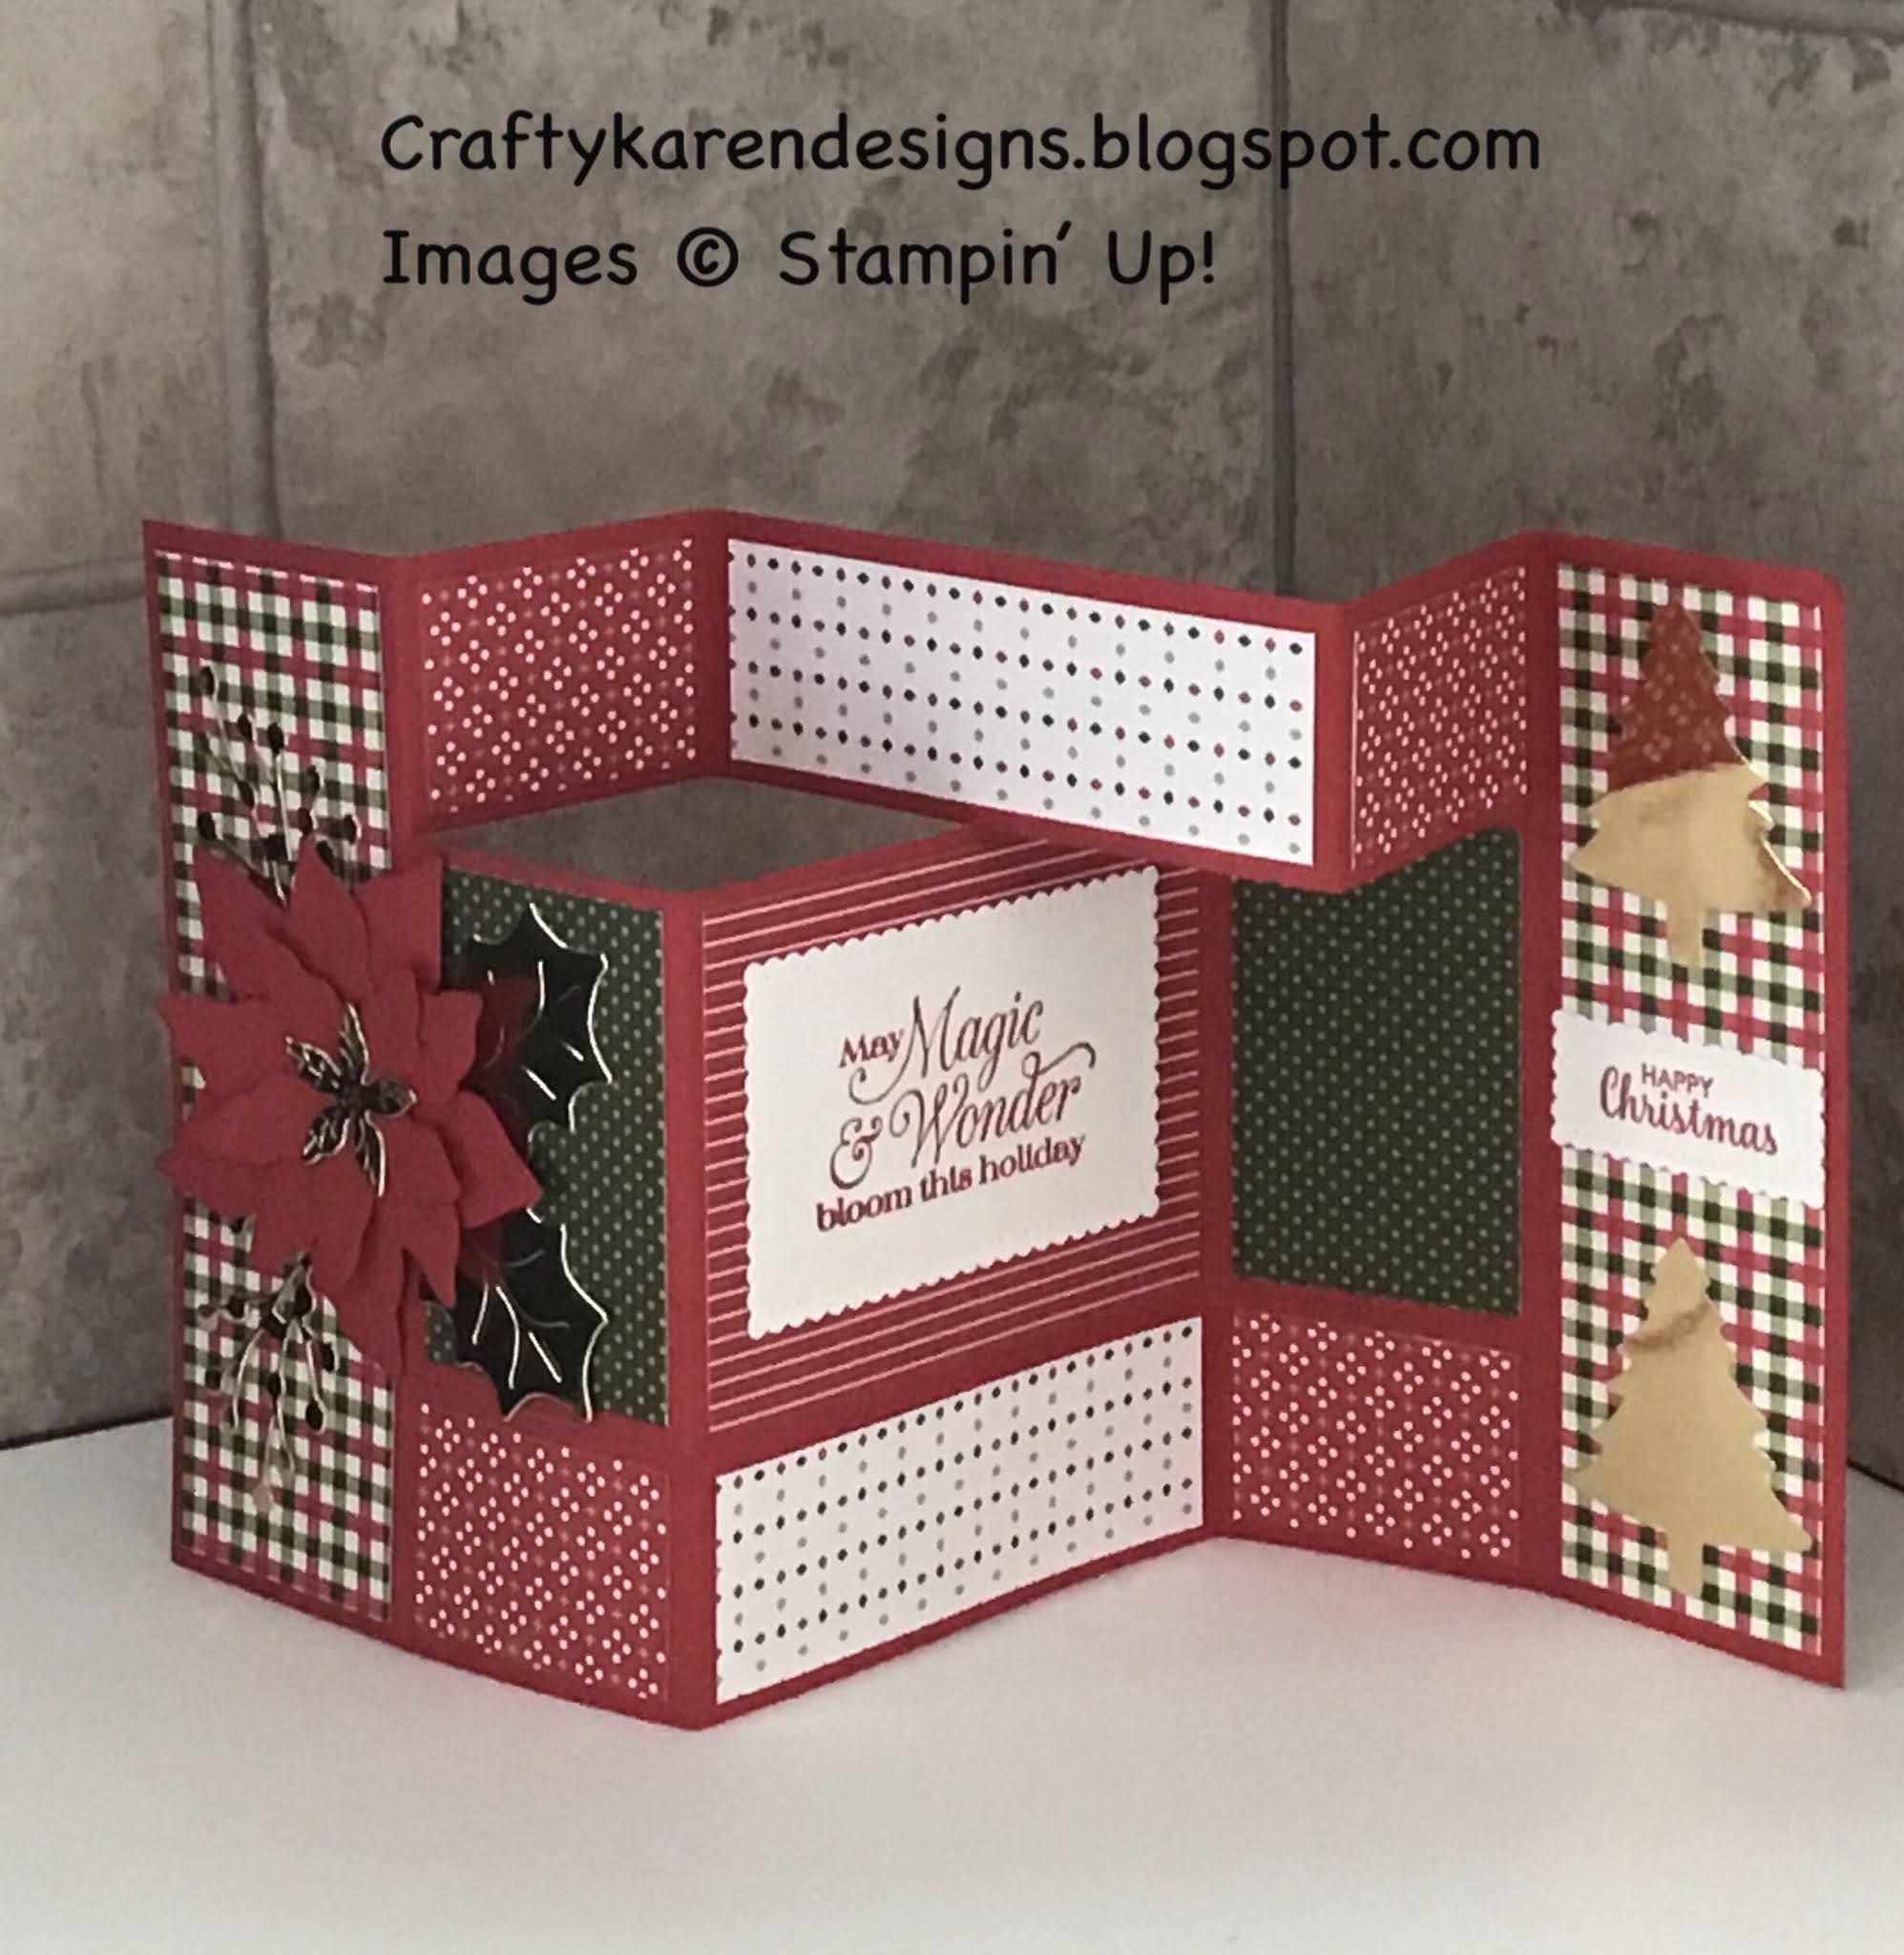
On the long side, score the card base at 2", 4", 8" and 10".
Put the card in your trimmer and on the short side cut at 1 1/2" between the first and last score lines only, then flip and so the same at the other side. 

Fold and burnish the score lines, from left to right - top and bottom - mountain, valley, mountain, valley. Fold and burnish the centre section - mountain, valley.
Now it's time to decorate - add the dsp layers to the mat layers and then to the card using wet glue to give you a little wiggle room if you need it. I've used several different patterns in the dsp but you could do them all the same if you wanted to.
Die cut a stitched scalloped rectangle that will fit across the first two panels - see picture, mine is approx 3 1/2" wide.
Stamp a sentiment on this layer and the remaining whisper white piece for the centre of the card.
Punch out a tree from the balmy blue glimmer paper and add to the sentiment layer with dimensionals and then add to the card front also with dimensionals. Add the stamped layer on top of the silver foil layer in the centre of the card.
Add some sequins and job done, a very cute tri fold shutter card which looks great in lots of dsp combinations, here's a picture of the sample one that I made using the Heartwarming hugs dsp and the poinsettia dies.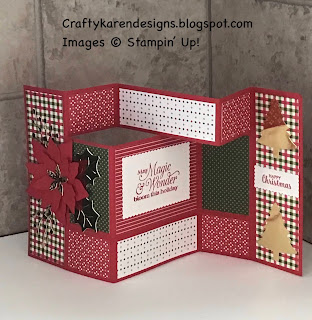
If you would like to join my Team or become one of my Discount Shoppers, you can message me on my Facebook Page at www.facebook.com/craftykarendesigns or via the Contact Me box below this Blog.
If you are interested in taking part in some challenges and having crafty chats with like minded people and a bit of a laugh, pop over to Crafty and Banter on Facebook (link in the side bar). This is a new group that some crafty friends and I are trying to get up and running and we would love your company.
If you are interested in taking part in some challenges and having crafty chats with like minded people and a bit of a laugh, pop over to Crafty and Banter on Facebook (link in the side bar). This is a new group that some crafty friends and I are trying to get up and running and we would love your company.
Happy Crafting,
Karen XXX
 Cardstock")


")


Evening Karen. Great video and instructions. Such an easy card to make - my first and it certainly wont be my last. XX Mal, Melbourne, Australia
ReplyDelete