Hi Everyone,
I wanted to make a special card as I have some special birthdays coming up so I went looking for inspiration with Mixed Up Crafts and Sam Calcott. As usual, she had just what I wanted with this one. I've made a similar ones in the past inspired by lots of people on YouTube and Pinterest but the dimensions for this one are Sam's. I made one as a 21st Birthday card for my Grandson (the star dies have retired now) and the other as a Birthday card for one of my Daughters and I chose the Heart Punches for this one. The pictures below are a mixture of both of the cards that I made but they were both made in exactly the same way apart from the toppers. Let me show you how I made it, there is a link to the video below:
Video Tutorial
Materials
6 pieces of coloured card stock 5 1/2" x 7", 1 piece 3" x 1", scrap for the sentiment
12 pieces of silver foil 1" x 6 3/4", scrap for the sentiment
12 pieces of dsp 3/4" x 6 1/2"
Scrap of basic white for the sentiment
Rich Razzleberry ink
Charming Sentiments stamp set
Pansy Patch
Sentiment Silhouette dies
Stampin' Cut & Emboss Machine
Hearts Punch Pack
Trimmer
Simply Scored
Bone Folder
Multipurpose adhesive
Dimensionals
Basic Rhinestones
Instructions
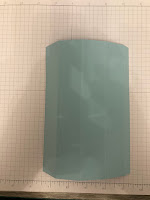
On the short side score each of the pieces of coloured card stock at 1 1/4", 2 1/2", 3 3/4" and 5" and fold and burnish all of the score lines.
Add glue to the tab section of each piece and then fold the other side over to meet the score line, this forms a tube. Repeat this with each of the pieces (see pictures). Then keeping the seam to the back of the tube, start to adhere them together, section by section (see pictures) until you have joined the sixth one to the 1st one to complete the star. Make sure that you keep the tops, bottoms and joins level otherwise your card will be wonky and won't stand up straight. Just take it slowly and it will be fine.
Then add the dsp layers to the silver foil mat layers and then add to each section keeping the borders equal. If you want to write a message on the card itself, leave one of the sections blank and add a piece of white card there instead (use the measurement for the silver foil mat). I decided to decorate all of mine and add a small gift card with my message instead.
Punch the scalloped heart in silver foil and the plain one in Fresh Freesia.
Stamp the sentiment on a scrap of fresh freesia using the Rich Razzleberry ink and then punch out.
Layer up the two hearts and then add the rhinestones around the sentiment.
Take the 3" x 1" strip of card and score at 1/2", 1", 2" and 2 1/2" and fold as shown in the picture. Add glue to the two smaller sections and adhere one either side of the point on the front of one of the sections (see picture). Then adhere your heart topper to the flat side that remains and it looks like your sentiment is floating on the front.
I punched out another set of hearts and added some silver twine to add a tag with my message. For the blue one, I'll die cut some more stars and add my message to that too.
I really like this card and think they both turned out beautifully, I hope that you will give it a go, it's not as complicated as it looks.
Please check out what Donna and Victoria have made this week too:
Donna Lester
Victoria Littlewood
If you would like to see more of my Blog Posts, sign up to my Weekly Newsletter.
If you would like to join my Team or become one of my Discount Shoppers, you can message me on my Facebook Page at www.facebook.com/craftykarendesigns or via the Contact Me box below this Blog.
If you are interested in taking part in some challenges and having crafty chats with like minded people and a bit of a laugh, pop over to Craft and Banter on Facebook (link in the side bar). This group is a collaboration with Taffy Crafting (Donna Lester) and Vickieloudesigns (Victoria Littlewood) and we would love you to join us.
Happy Crafting,
Karen X
Product List


