
Hi Everyone,
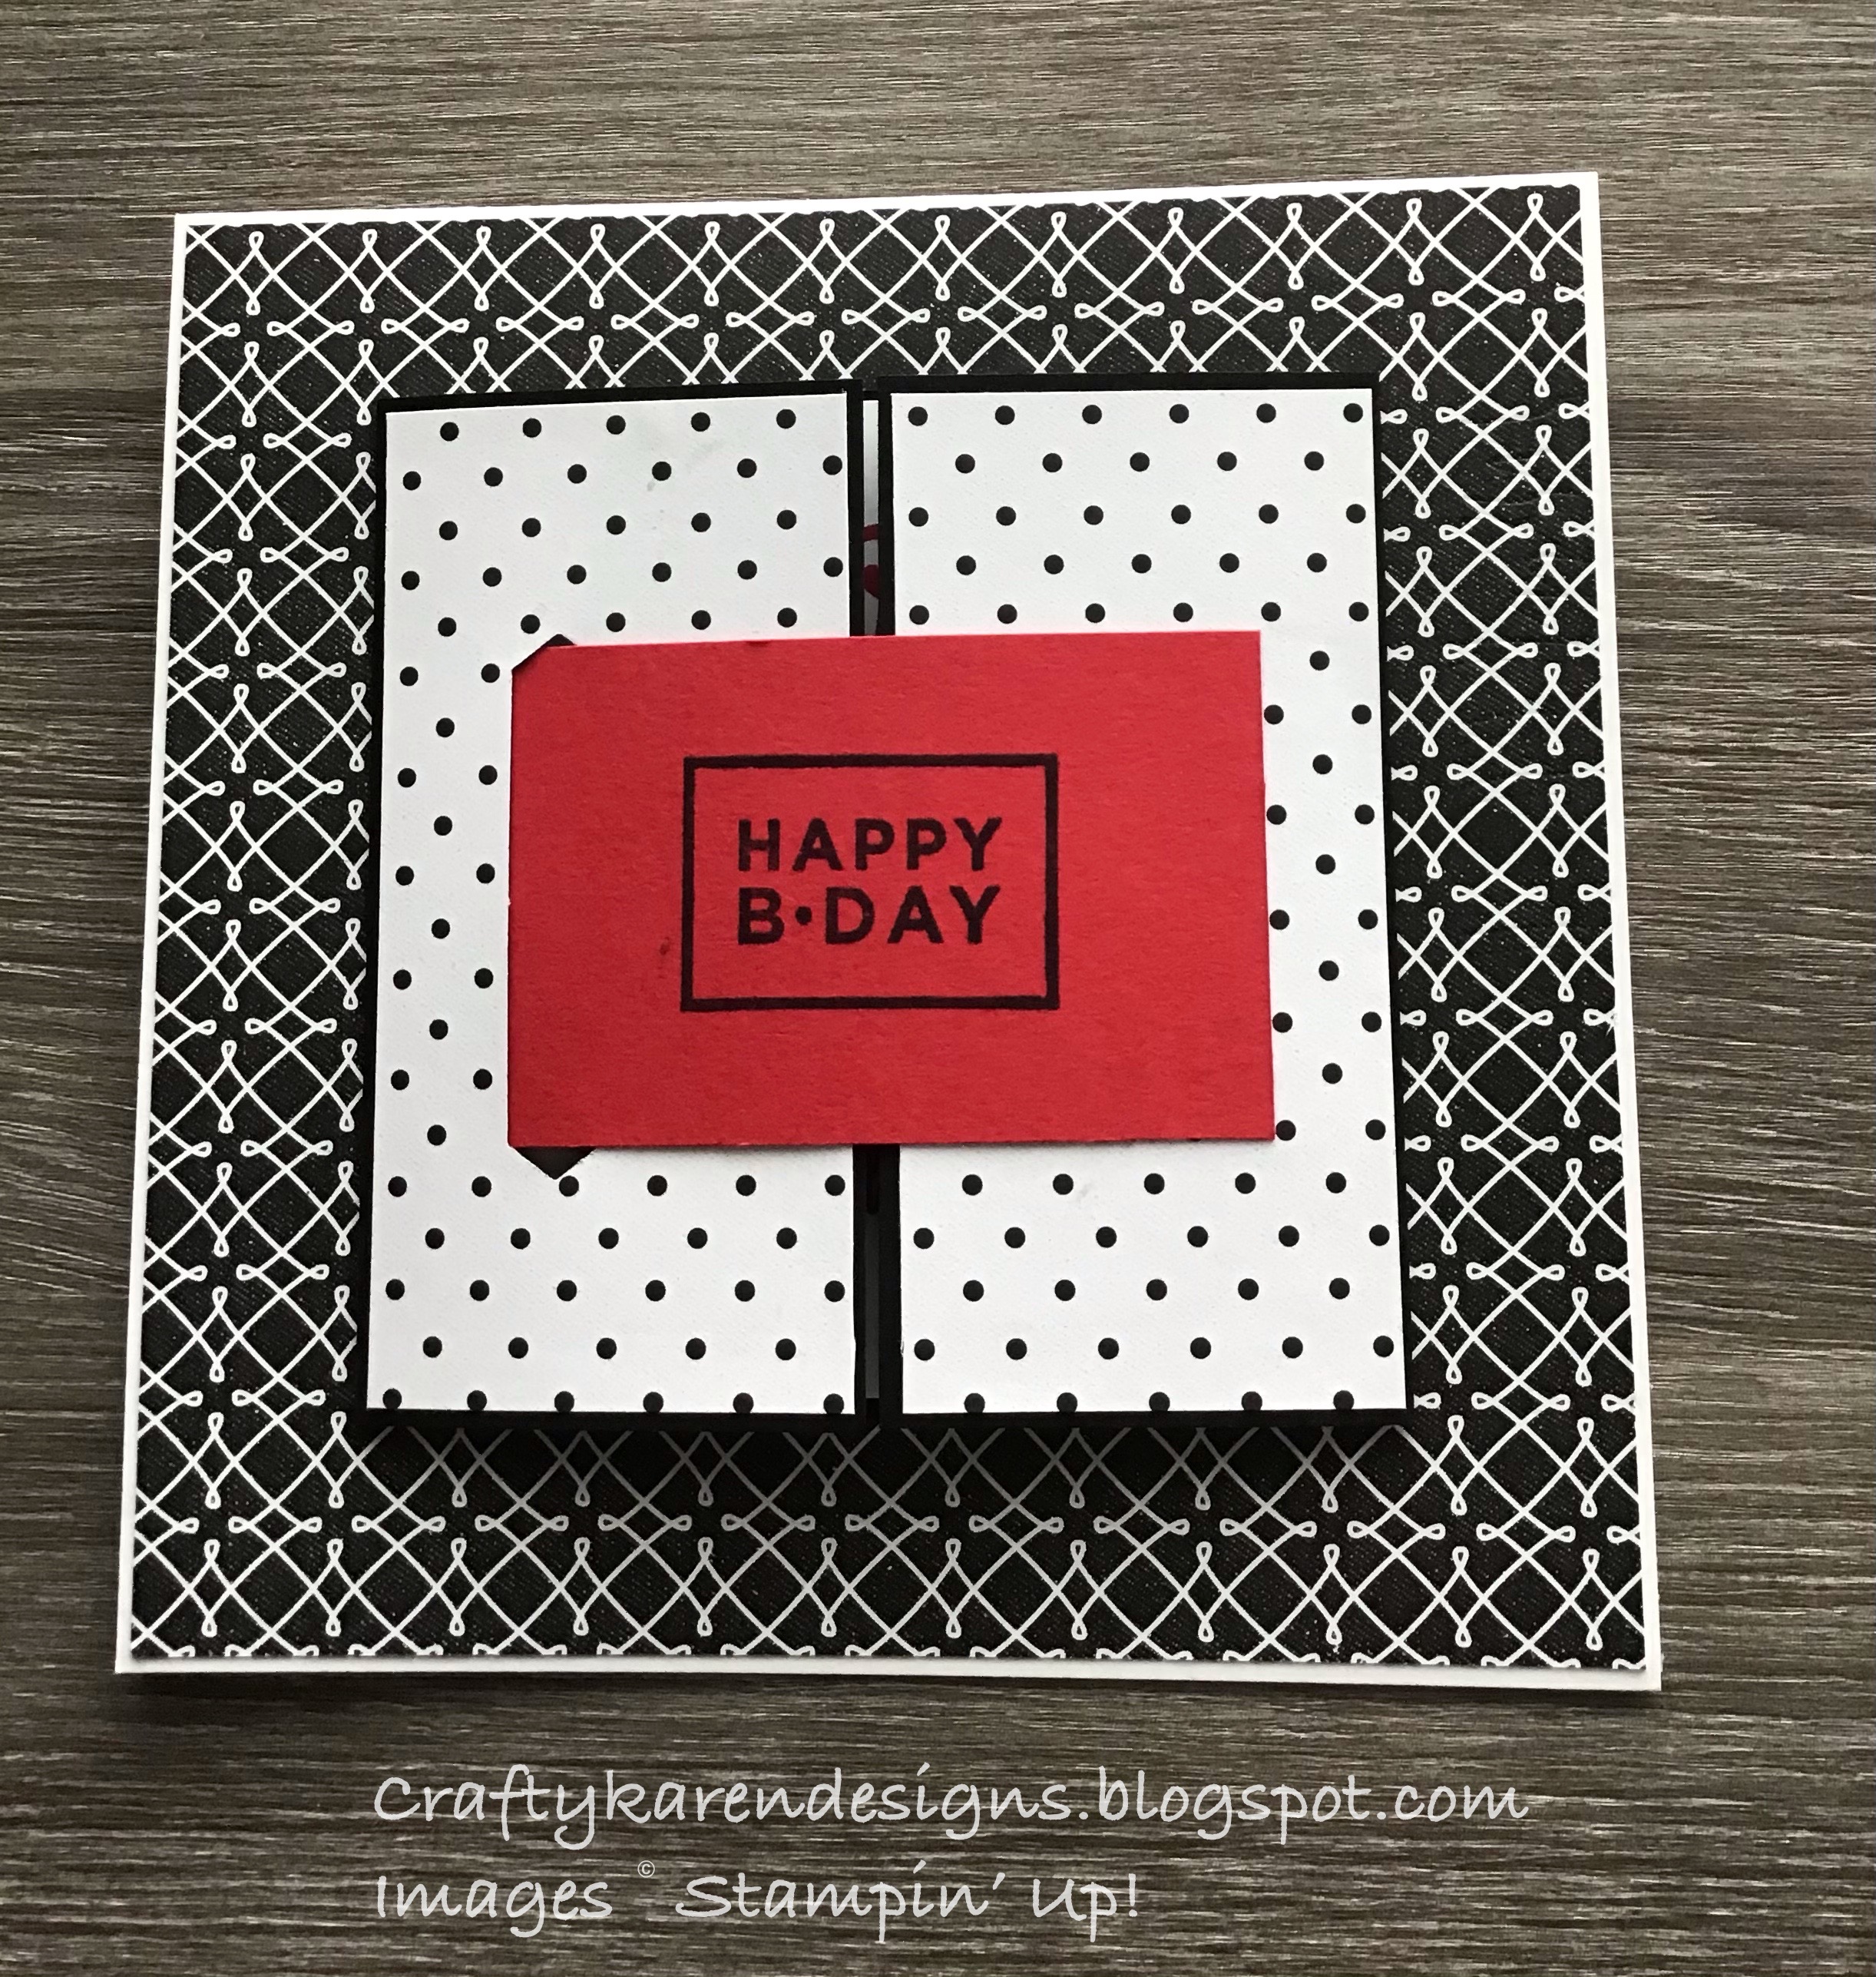

Today I am hopping with the Ink Stamp Share Group, you have arrived here from Mo's page, so welcome. The theme for today's hop is 'Men/Boys' which I always find quite hard to do. I have designed a fun fold card (well I think I have designed it, I haven't seen another one like it anywhere!). It's a square tent fold with a smaller gatefold on the front which has a buckle fastening. This fold could be adapted for any occasion by changing up the designer series paper and the sentiments but I have used the monochrome patterns on the True Love dsp and the Happiest of Birthdays stamp set. Let me show you how I made it.
Materials
1 piece of thick basic white card stock 5 3/4" x 11 1/2", 1 piece 3 7/8" square
1 piece of basic black card stock 4" x 8"
1 piece of real red card stock 2" x 3"
1 piece of True Love dsp 5 5/8" square
2 pieces of a co-ordinating pattern 1 7/8" x 3 7/8"
Happiest of Birthdays stamp set
Memento Black ink
Real Red ink
Classic Label punch
Trimmer
Simply Scored
Bone folder
Multipurpose adhesive
Instructions
On the long side, score the thick basic white at 5 3/4" and fold and burnish to make a tent fold card.
On the long side, score the basic black at 2" and 6" and fold and burnish to make the gatefold card.
Adhere the square piece of dsp to the card front leaving a small border around the edges.
Add the strips of dsp to the gates on the smaller card making sure that the top and bottom edges line up when its closed.
Line up the Classic Label punch so that it is in the centre of the left hand gate and punch out.

Stamp a sentiment on the square piece of basic white card using real red ink and add on the inside of the gatefold card. Stamp another sentiment or decorate the inside of the larger card.
Stamp a sentiment in black in the centre of the strip of real red card. Feed one end in through the front of the punched section and line up so that it is central across the gates when closed. Add a little bit of adhesive to the opposite end of this strip and adhere to the right hand gate (see picture).
Adhere the smaller card to the centre of the larger card front.
Please click on the button to go to the next blog in the hop which is Tracie:

Roll Call
If you would like to see more of my Blog Posts, sign up to the email alert over in the right hand side bar of the page.
If you would like to join my Team or become one of my Discount Shoppers, you can message me on my Facebook Page at www.facebook.com/craftykarendesigns or via the Contact Me box below this Blog.
If you are interested in taking part in some challenges and having crafty chats with like minded people and a bit of a laugh, pop over to Crafty and Banter on Facebook (link in the side bar). This is a new group that some crafty friends and I are trying to get up and running and we would love your company.
If you are interested in taking part in some challenges and having crafty chats with like minded people and a bit of a laugh, pop over to Crafty and Banter on Facebook (link in the side bar). This is a new group that some crafty friends and I are trying to get up and running and we would love your company.
Free Tutorial Bundle
I have joined together with a group of Stampin' Up! Demonstrators from around the world to compile a selection of 38 tutorials to give to my customers. The Tutorial Bundle comes as a PDF file complete with pictures and instructions for all of the projects. You can get this great resource FREE with any order over £10.

Happy Crafting,
Karen X


")

Oh my! What a wonderful card. So simple, but gorgeous, even though its 'masculine', it's work for anyone!
ReplyDeleteFabulous card Karen xx
ReplyDeleteGreat fold Karen and I really like that large sentiment when it opens out. x
ReplyDeletelove the fold, must try it
ReplyDeleteGreat card!
ReplyDeleteAwesome card I love this DSP!
ReplyDeleteGreat card Karen, love black, white and a pop of colour x
ReplyDeleteWhat a fabulous card, love the design and colour combo xx
ReplyDeleteNice card x
ReplyDeleteLove this - not seen this fold before.
ReplyDeleteThank you everyone for all the lovely comments x
ReplyDelete