

Today I want to show you how to make this cute caddy to hold adhesives on your desk. Peaceful poppies designer series paper will disappear when the new Annual Catalogue comes out in June and I love it so much I wanted to keep a little bit of it around.
Materials
1 piece of card stock 6 1/2" x 6 1/2" (for the dimensional section)
1 piece of card stock 8 1/2" x 6" (for the adhesive section)
1 piece of card stock 5" x 5" (for the glue holder)
1 piece of card stock 2" x 10 3/4" to wrap around from the front
1 piece of card stock 3" x 10 3/4" to wrap around for the back.
Dsp - 1 piece 4 1/4" x 2 3/4", 1 piece 1 3/4" x 4 1/4", 2 pieces 3" x 2 7/8" (these pieces will need to be trimmed to fit the side sections)
Multipurpose adhesive
1 1/2" circle punch
Trimmer
Simply Scored
Instructions

 Dimensional Section - Score at 1" and 5 1/2" on one side and then turn 90 degrees and score at 3" and 4", fold and burnish all the score lines and then cut up the score lines as in the picture. Then add adhesive to the small middle tabs and adhere it to the shorter of the two long edges. Then adhere the longer side over the top of that.
Make a diagonal cut on the sides from the front up to the back to shape the sides.
Adhesive Section - Score on the long side at 2" and 6 1/2" and then at 2" and 4" on the short side and fold and burnish all the score lines. Cut up the centre tabs and adhere together as in the picture.

Tombow Holder - Score at 1 1/2" and 3 1/2" on both sides and fold and burnish all the score lines. Cut up the centre lines to make tabs and then fold one of the centre side sections under to be able to push the punch in to punch a hole in the centre section.


Glue the side tabs in place to make a square box with the hole at the top. One of the sides will also have a partial circle cut out of it too but it doesn't matter, it won't be seen. Then add adhesive to two sides of this box and place inside the left hand side of the adhesive box that you made above.


Add adhesive to the back of this box and glue it to the front of the dimensional box to fix them both together.
Take the 2" strip of card stock and fold it around the front and the sides of the box to strengthen it, pinch where it goes around the sides and then burnish the fold to make it crisp. Adhere this strip around the front and two sides.

 Repeat with the 3" strip but around the back and the sides.
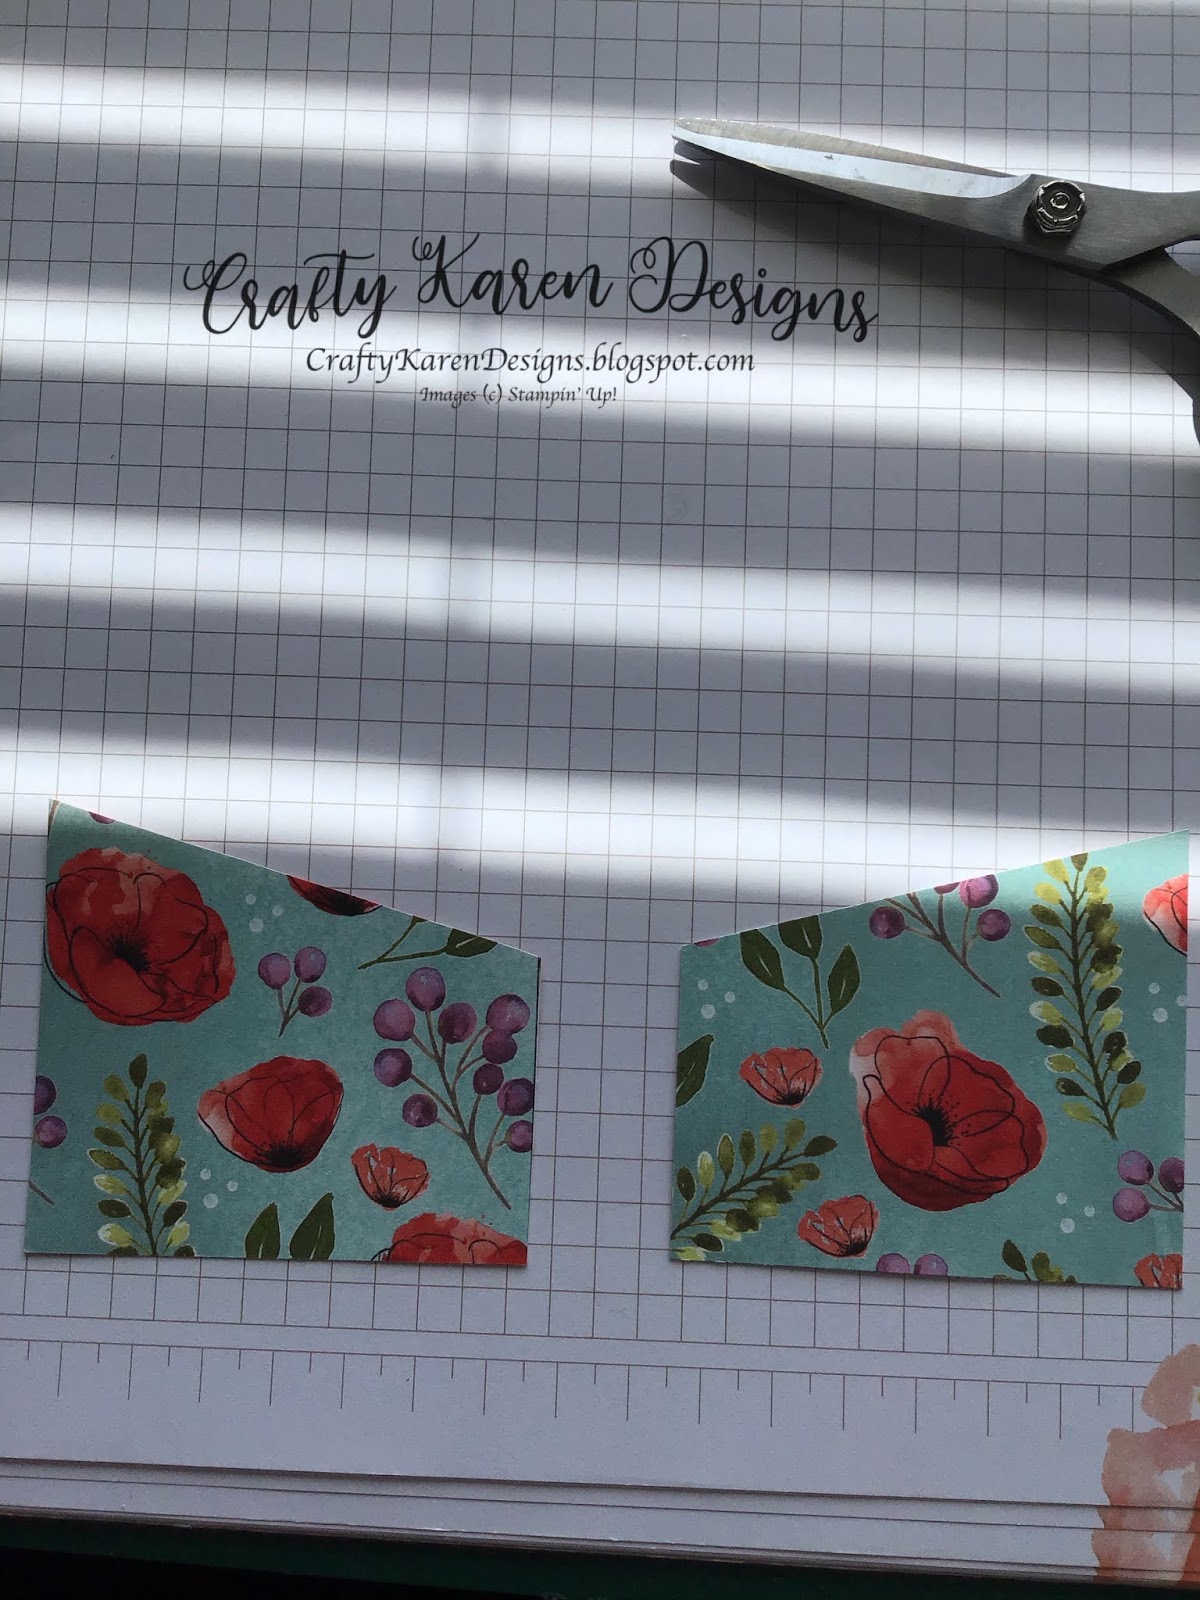
Then make a diagonal cut on the sides from the front up to the back to shape the sides as before.
Add the dsp layers - the front and back ones are simple enough. The sides ones need to be shaped in the same way as the sides of the box. Each box will be slightly different depending on how well you have measured it, it could be a tiny bit out, mine was. So the easiest thing to do is measure at the back, remembering that you need a border as in the picture, and measure at the front and then make a diagonal cut between the two marks and remember that they need to be a left and a right.
Now its ready to fill - dimensionals and tear and tape in the back, tombow, snail and a glue eraser in the front. I hope that you like this project and will give it a go.

If you would like to see more of my Blog Posts, sign up to the email alert over in the right hand side bar of the page.
If you would like to join my Team or become one of my Discount Shoppers, you can message me on my Facebook Page at www.facebook.com/craftykarendesigns or via the Contact Me box below this Blog.
Happy Crafting,
Karen XX


 Circle Punch")
What a brilliant idea - love this particular paper - sad it won't be around after June. Stay well xx
ReplyDeleteThanks Jane xx
DeleteThis comment has been removed by the author.
ReplyDeleteKaren, thank you for this wonderful tutorial. I have made caddies, but I especially enjoy the small and convenient caddy you have created. It is perfect to house the adhesives and have readily available while working on a project. It was very easy to make. Again, thank you.
ReplyDeleteThank you so much, glad you like it
ReplyDeleteLove this - thank you for sharing! Can you tell us what color is the card stock you used with this project?
ReplyDeleteNever mind, just saw the supplies at the bottom. It's pool party. :)
DeleteI made my caddy over the weekend and LOVE it! Thank you for sharing your design!
Delete