
Hi Everyone,


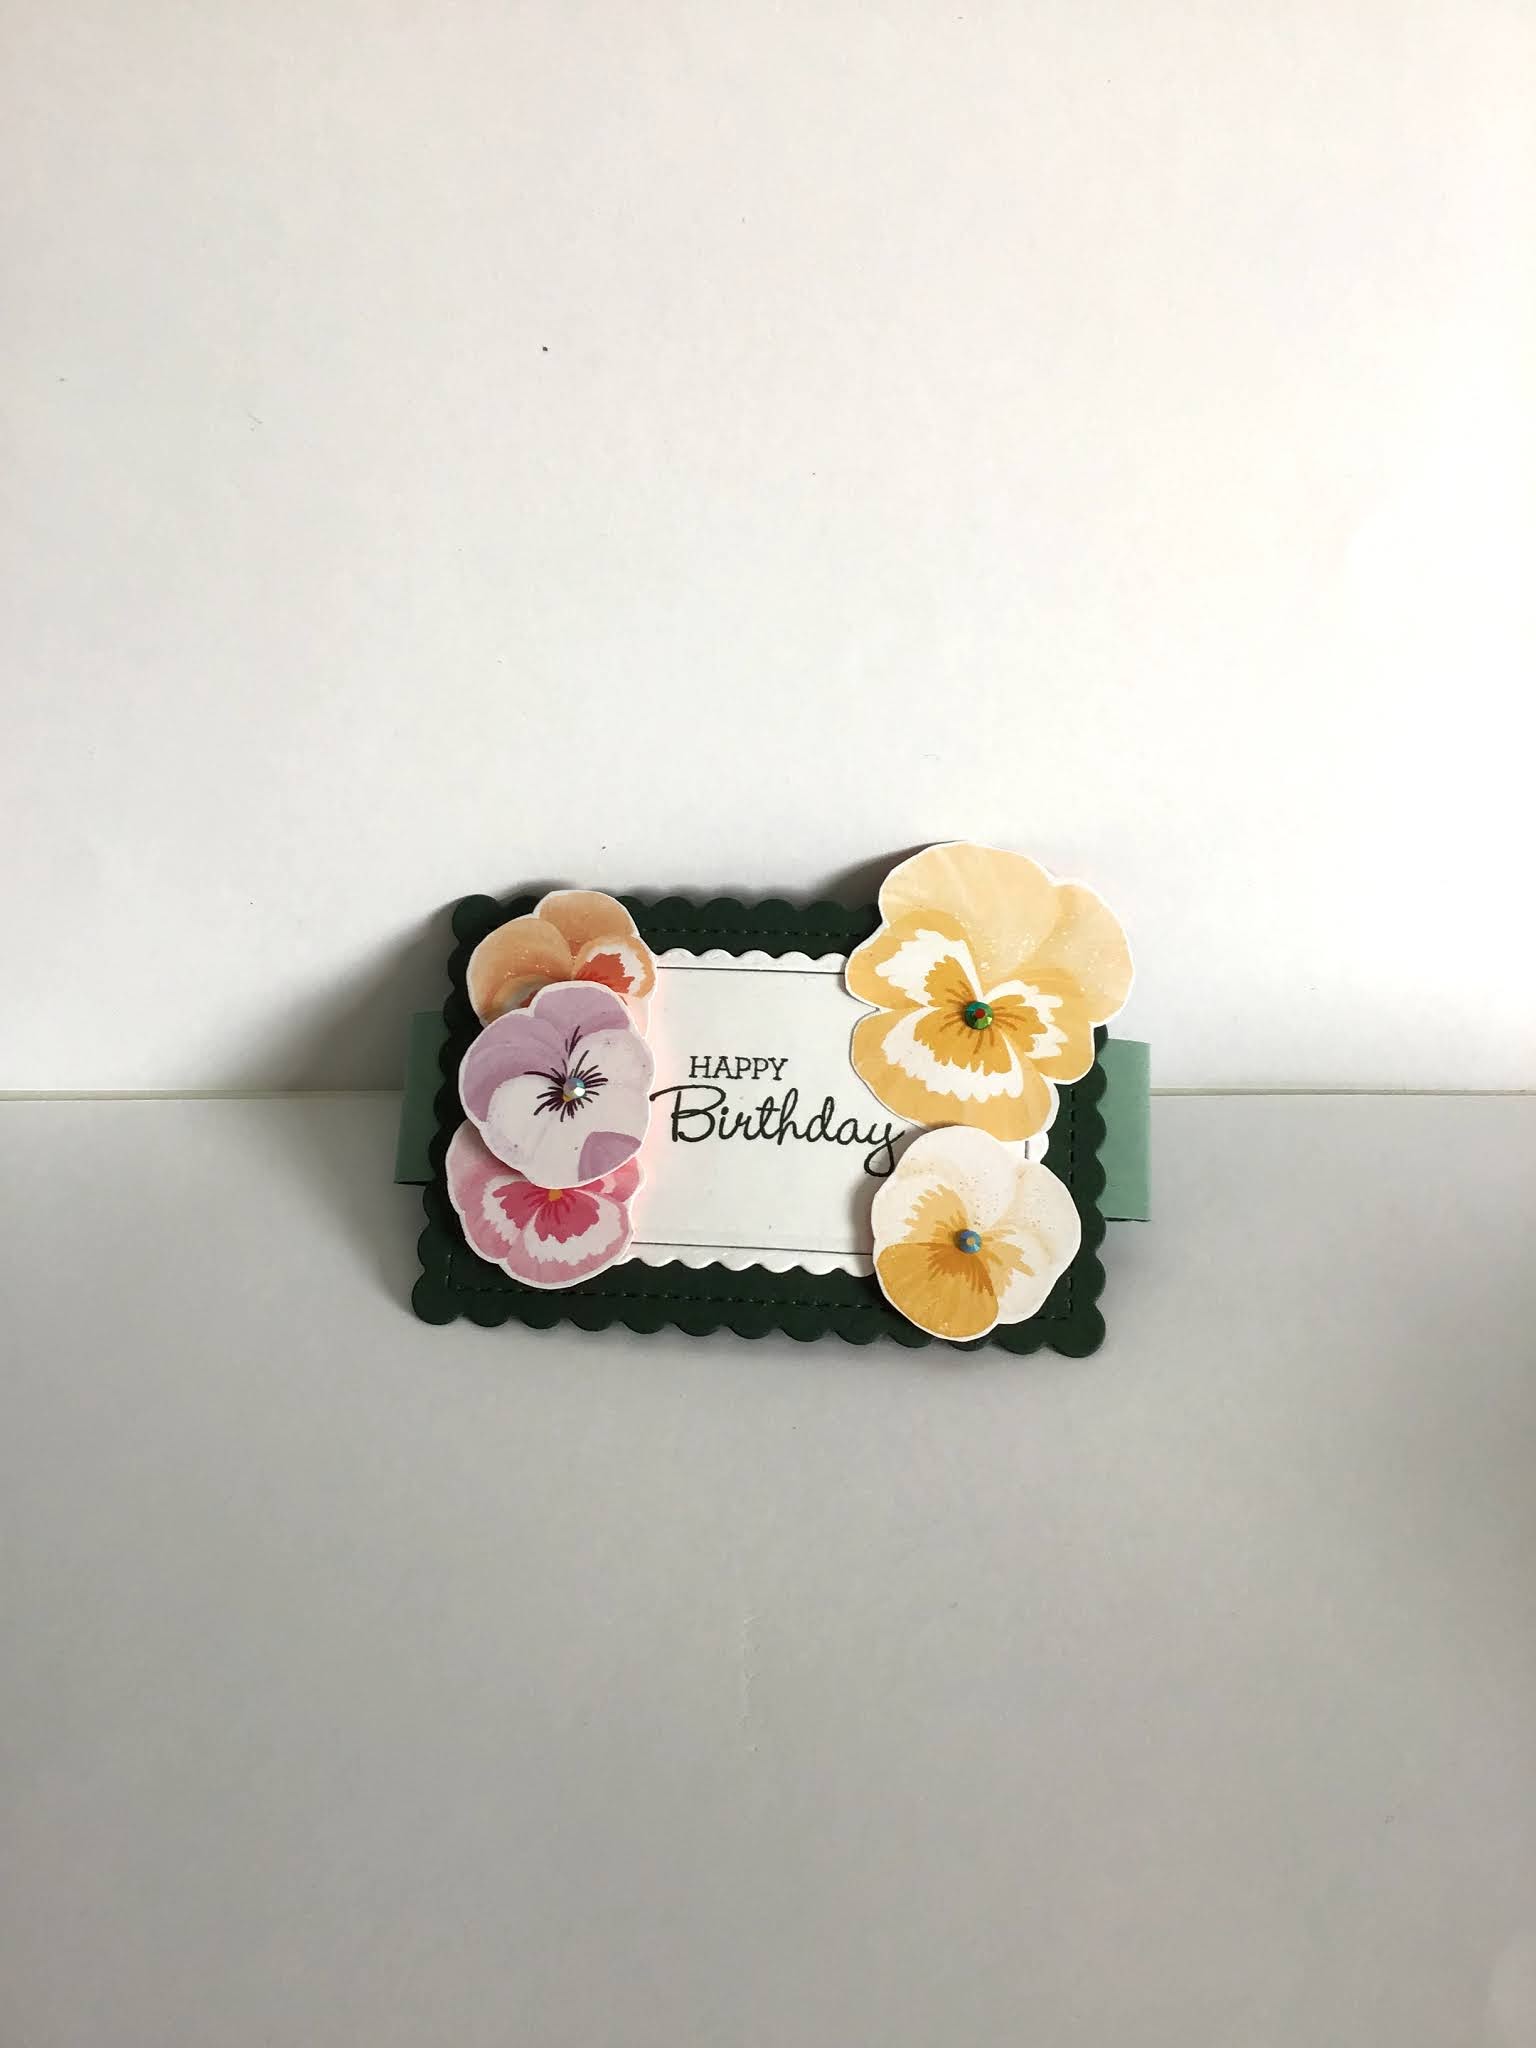
Today I am hopping with the Stamp 'n Hop group and the theme is 'Favourite Bundle', mine is Pansy Petals (this week anyway, ask me again next week haha). I have made a Gatefold Easel Card and my thanks go to TX Stampin' Sharon for the inspiration but I have tweaked the measurements slightly for my version.
Materials
1 piece of soft succulent card stock 5 7/8" x 8 1/2", 1 piece 4" x 6 1/4", 1 piece 1" x 8 1/4"
1 piece of evening evergreen 4" x 5 7/8"
1 piece of basic white 4" x 5 7/8", 1 piece 3 3/4" x 5 5/8"
Scraps of evening evergreen and basic white for the die cut rectangles
1 piece of dsp 3 3/4" x 5 5/8", 4 pieces 1 7/8" x 5 5/8"
Scraps of dsp with larger pansies for die cutting
Pansy Patch stamp set
Pansy dies
Scalloped Contour dies
Stampin Cut and Emboss machine
Trimmer
Simply scored
Bone folder
2021-2023 In Colour jewels
Polished Pink ink
Fresh Freesia ink
Evening Evergreen ink
Multipurpose adhesive
Dimensionals
Instructions
Score the soft succulent card stock on the long side at 2 1/8" from each side, fold and burnish to make the gatefold card. Score the other piece of soft succulent on the long side at 3/8" from one side and then turn around and score at 2 3/4" from the other side and fold and burnish the score lines.
Fold over the 3/8" section and adhere to the inside of the card keeping the fold flush with the top of the card to make a lift up easel section in the middle of the card.
Adhere the strips of dsp to both sides of the gates. Add the large piece of dsp to the larger white layer and then adhere on the inside of the card underneath the lift up easel section. When the easel stands, it will rest on this section.
On the remaining white card layer, stamp a sentiment and a small pansy, then adhere this to the evening evergreen mat layer. Add adhesive to the back of this mat layer but in the bottom half only and add to the soft succulent layer on the inside of the card. This will form the easel.


Die cut several of the flowers from the dsp in both sizes as well as one white and one evening evergreen scalloped rectangle to use as mats on the card front.
Add one of the large flowers, on a dimensional to the inside of the card to act as a stopper for the easel.
Stamp a sentiment on the white scalloped rectangle and then adhere to the evening evergreen mat. Take the 1" strip of soft succulent and fold it loosely around the card to form the belly band and then adhere the mat over the two ends to connect them. Arrange the remaining flowers on the mats and the card front as you like. Add some jewels to the flower centres for a bit of bling.
I hope that you like my card and will give it a try. Please follow the links to see what everyone else has made, see if anyone else has the same favourite as you. Or, maybe, you will be inspired to try something that you don't already have and didn't think you needed.

If you would like to see more of my Blog Posts, sign up on the pop up form and you will get my weekly Newsletter with all the details of my latest projects and news from Stampin' Up!
If you would like to join my Team or become one of my Discount Shoppers, you can message me on my Facebook Page at www.facebook.com/craftykarendesigns or via the Contact Me box below this Blog.
If you are interested in taking part in some challenges and having crafty chats with like minded people and a bit of a laugh, pop over to Craft and Banter on Facebook (link in the side bar), we would love your company.
If you are interested in taking part in some challenges and having crafty chats with like minded people and a bit of a laugh, pop over to Craft and Banter on Facebook (link in the side bar), we would love your company.
I've collaborated with Stampin' Up! Demonstrators from all over the world to put together a Fancy Fold Cards Tutorial Bundle containing 30 different projects. We are offering this bundle FREE with any purchase from our online stores. If you would like a copy of this fantastic bundle, place an order using the current Hostess Code (see the details in the side bar of my blog) and I will forward you the PDF Tutorial.

Happy crafting,
Karen X


 Designer Series Paper")
")


What a clever fold! I can see I am going to have to CASE this! Lx
ReplyDeleteAbsolutely love this fold, definitely on my CASE list. Beautiful xx
ReplyDeleteA great fold and a great card x
ReplyDeleteFab card Karen :-)
ReplyDeleteGreat fun fold card Karen, love it x
ReplyDeleteBeautiful card Karen, thank you for sharing x
ReplyDelete