
Hi Everyone,


Materials
1 piece of thick basic white card stock 5 7/8" x 11 1/2"
2 pieces of misty moonlight card stock 3/8" x 5 3/4", 2 pieces 1 3/4" x 5 3/4", 1 piece 7/8" x 5 3/4", 1 piece 1" x 5 3/4"
Scraps of basic white and misty moonlight for the sentiment
2 pieces of dsp 1/4" x 5 5/8", 2 pieces 1 5/8" x 5 5/8", 1 piece 3/4" x 5 5/8", 1 piece 3/4" x 5 5/8"
Misty moonlight ink
Daffodil delight ink
Hand-Penned Petals stamp set
Basic Rhinestone jewels
Multipurpose adhesive
Foam strips/dimensionals
Trimmer
Simply scored
Bone folder
Tailored Tag Punch
Instructions
On the long side, score the thick white at 1/2", 2 3/8", 3 3/8", 5 1/4" and 5 7/8" and fold and burnish the score lines (mountain, valley, mountain, mountain, valley).
Adhere the mat layers to each of the sections except for the 1" end piece which will be added to the inside of the card to tuck the front into.
Add the dsp layers to all of the mat layers leaving an equal border all around.
Adhere the first 1/2" section on the front to the base of the card to form a spine (see picture).
Add foam strip or a row of dimensionals along the back of the 1" x 5 3/4" mat for the inside, keep it towards the middle and the outer edge. (In the video I put two pieces on and covered the whole of the back of this piece but it doesn't allow for the front piece to tuck under it far enough, don't do what I did haha). Adhere this piece in place and the front edge should tuck underneath it when stood up and on show.
Punch out a white tag and two halves of a blue tag for the sentiment. Stamp the 'spriggy' bits in daffodil delight (stamp off once) on the white tag and then stamp over them with the sentiment in misty moonlight. Add the white layer to the two halves of the blue to add a border top and bottom (see picture). Add a couple of rhinestones and then add the tag to the centre panel of the card.
I have also stamped some flowers in misty moonlight on the inside of the card but you could add some dsp or leave plain as required.
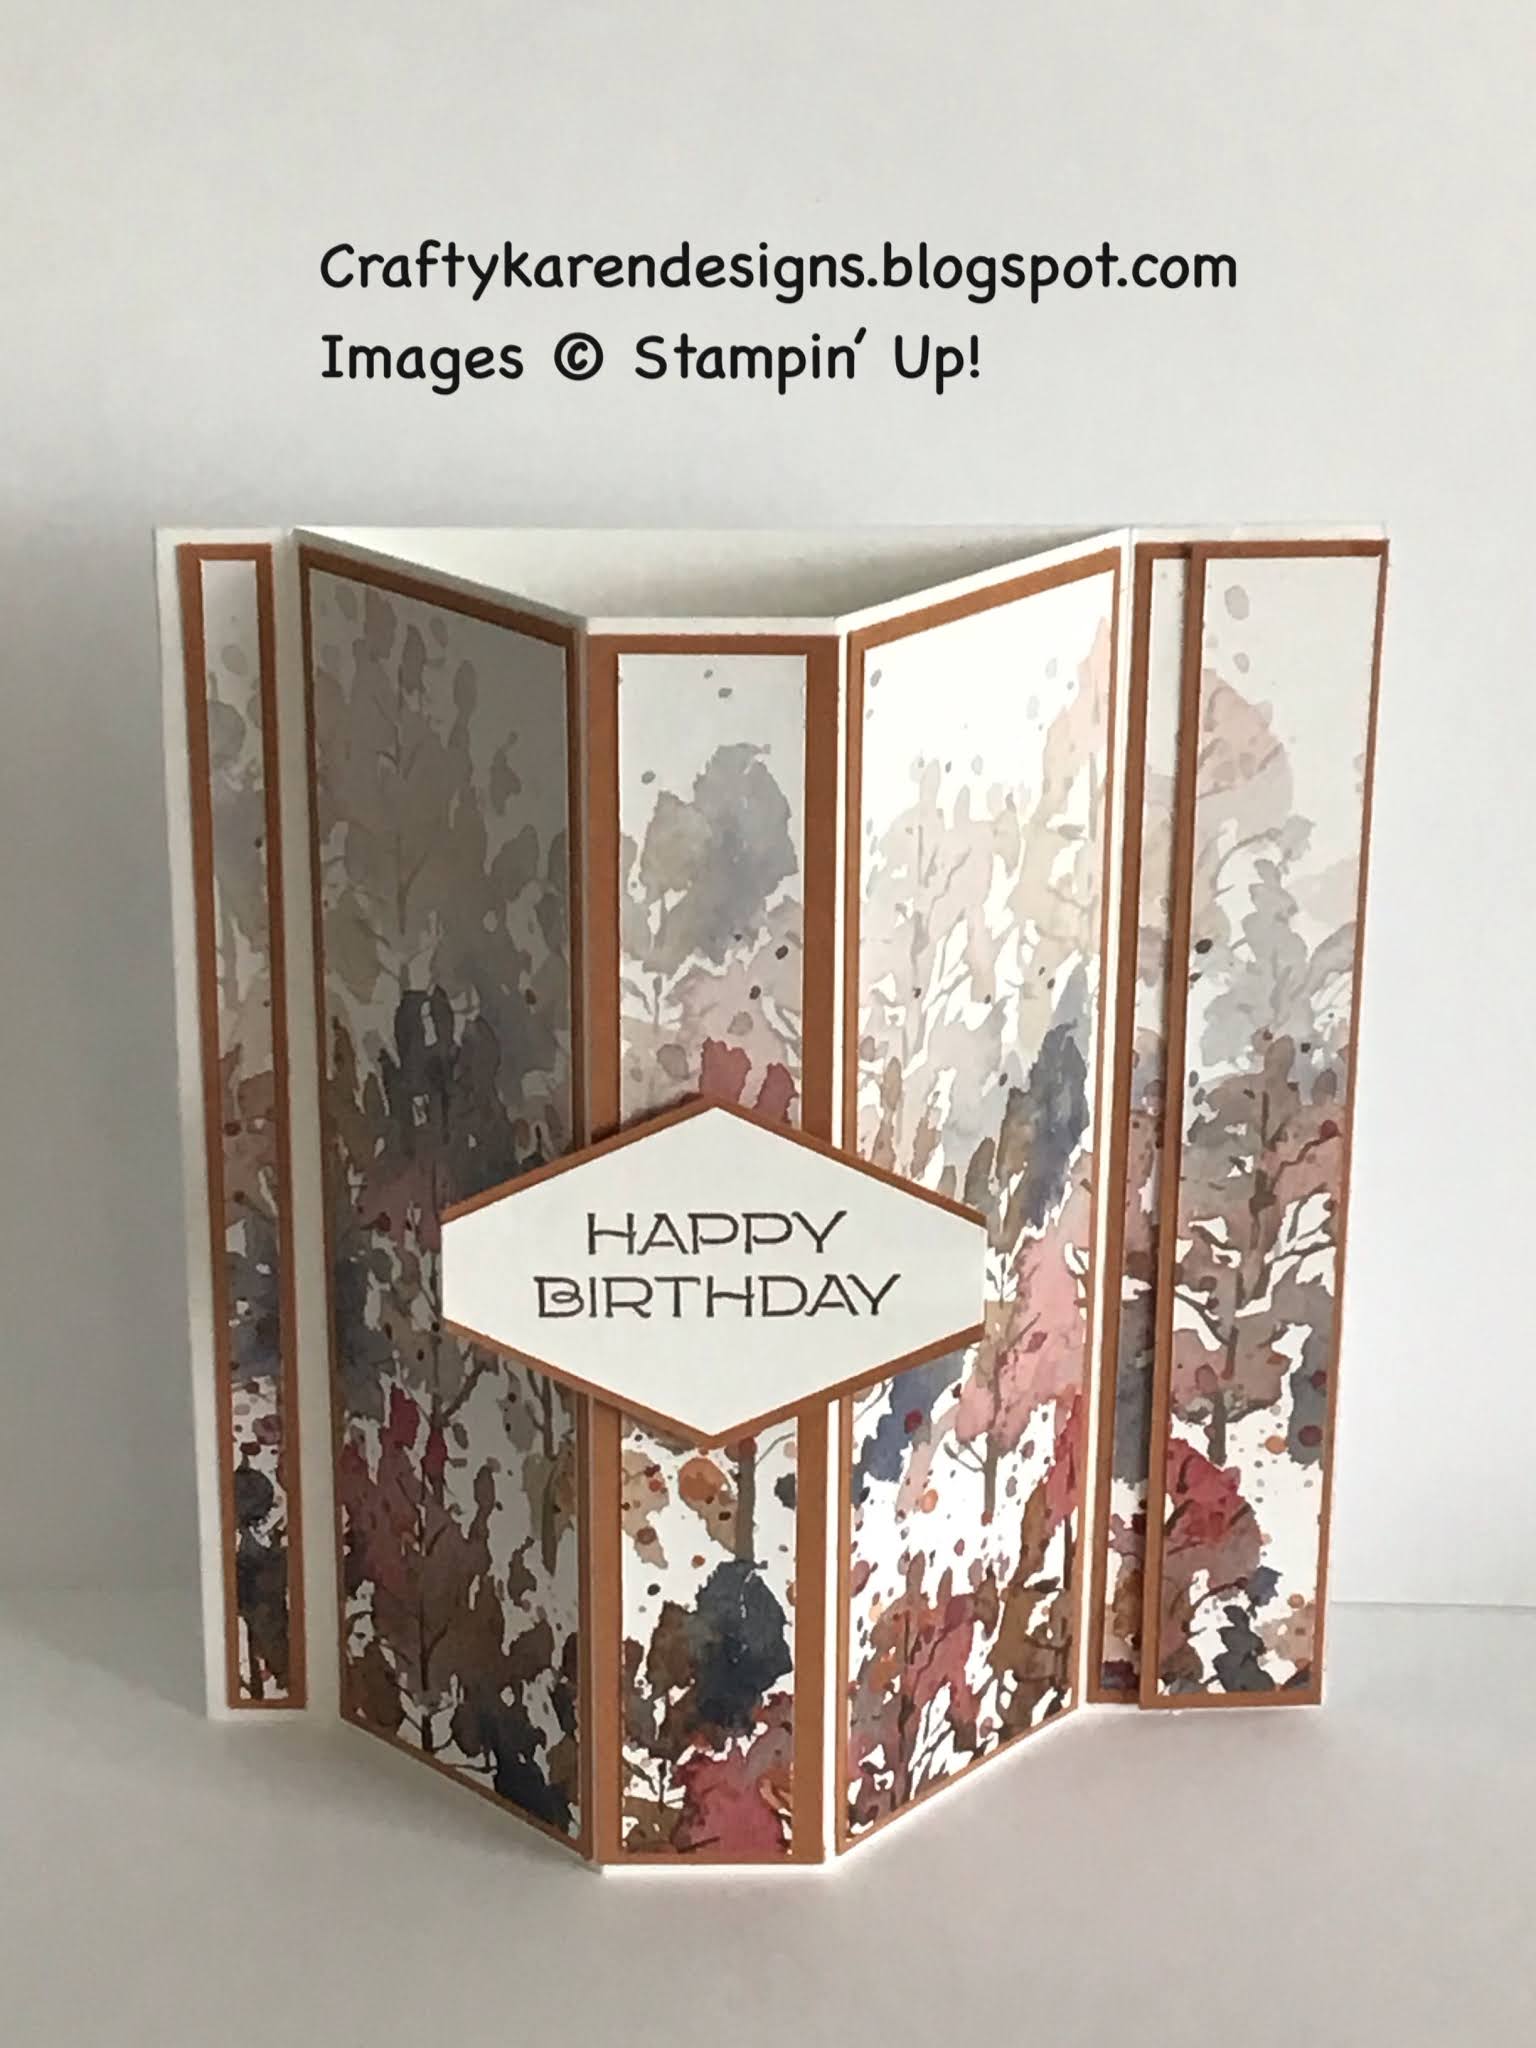
Here is another version of this card using the Beauty of the Earth dsp and cinnamon cider for a more masculine (less flowery) version. I do hope that you like my card and will give it a try.

If you would like to see more of my Blog Posts, sign up on the pop up form and you will get my weekly Newsletter with all the details of my latest projects and news from Stampin' Up!
If you would like to join my Team or become one of my Discount Shoppers, you can message me on my Facebook Page at www.facebook.com/craftykarendesigns or via the Contact Me box below this Blog.
If you are interested in taking part in some challenges and having crafty chats with like minded people and a bit of a laugh, pop over to Crafty and Banter on Facebook (link in the side bar), we would love your company.
If you are interested in taking part in some challenges and having crafty chats with like minded people and a bit of a laugh, pop over to Crafty and Banter on Facebook (link in the side bar), we would love your company.
Happy crafting,
Karen X


 Designer Series Paper")


No comments:
Post a Comment