
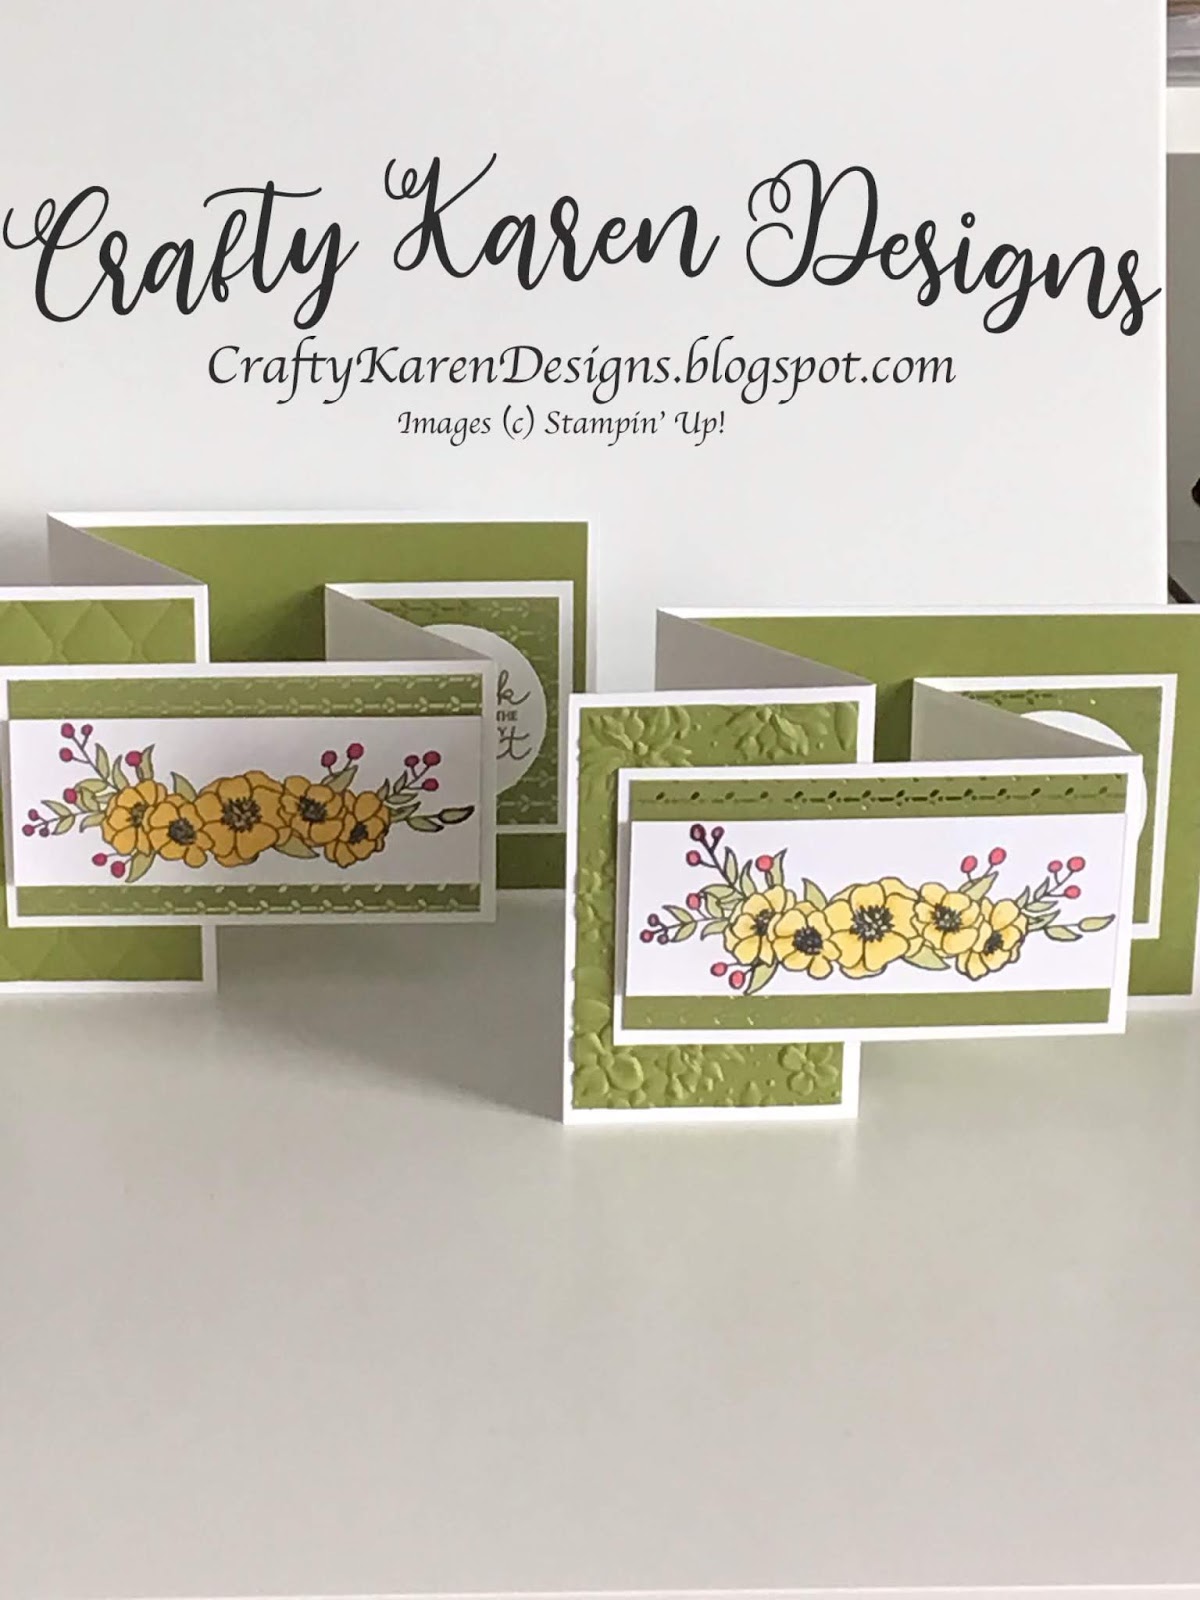
Today I have had a great time with my friend and colleague Donna Lester (aka Taffycrafting) where I have shown her how to make a double z fold card on my YouTube channel. We did some side by side crafting and had a good few laughs along the way. This is what we made, a pretty double z fold card using embossing folders and the noble peacock designer series paper and we decorated it with some coloured images from the Bloom and Grow stamp set.
Follow the video at
https://youtu.be/WrA40XYNcjc
Materials
1 x 11" x 4 1/4" whisper white card stock, scored at 2 3/4" and 5 1/2"
1 x 10" x 2 3/4" whisper white card stock, scored at 4 3/4" and 7 1/2"
1 x 4 1/2" x 1 3/4" whisper white to stamp the floral image
scrap of whisper white for the sentiment
1 x 5 1/4" x 4" old olive card stock
1 x 2 1/2" x 4" old olive card stock (for the embossing)
1 x 4 1/2" x 2 1/2", 1 x 2 1/2" x 2 1/2", 1 x 2 1/2" x 2 1/4" pieces of noble peacock dsp
Country Florals/Tufted embossing folders
Die cutting machine
Old olive ink pad
memento black ink pad
Selection of blends to colour the image
Bloom and Grown stamp set
2" circle punch
Multipurpose adhesive
Dimensionals
Bone folder
Trimmer
Instructions
Fold and burnish the whisper white card bases.
Adhere the largest piece of old olive card stock to the largest section of the bigger card base.
Emboss the smaller piece of old olive card stock with your chosen embossing folder and then adhere to the left hand section of the larger card base (see finished card in the photo above).
Adhere the pieces of noble peacock foiled dsp to the sections of the smaller card base and then adhere the whole thing centrally to the larger card base (see the photo of the finished card)
Stamp the floral image in memento black ink on the 4 1/2" x 1 3/4" piece of whisper white card stock and colour in with your chosen blends. Then fix this to the front section of the card with dimensionals.
Stamp the sentiment on the scrap of whisper white in old olive ink and then punch out with the 2" circle punch and adhere to the centre of the right hand section of the smaller card base which is on the front of the card - this is in effect the inside of the card (see the photo above).
There are more detailed instructions for making double z fold cards here on my blog, feel free to scroll through the archive to see other examples). I do hope that you will give this a try. I had a great time crafting with my friend Donna, please check her blog out at www.taffycrafting.blogspot.co.uk
Happy crafting,
Karen XX


 Circle Punch")


No comments:
Post a Comment