Showing posts with label Bottled Happiness. Show all posts

Wednesday, 18 January 2023

Bottled Happiness - Creative Colour Challenge #72

Hi Everyone,


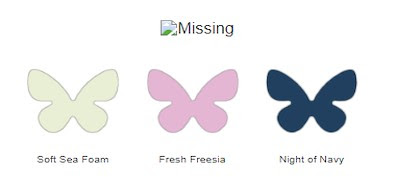
Today I thought I would have a go at my friend Victoria's Creative Colour Challenge #72, I really like the colours. I thought I would drag out a stamp set I haven't played with for a while and combine the two. I hope that you like it.
Materials

1 piece of fresh freesia card stock 5 7/8" x 8 1/4"
1 piece of night of navy card stock 3 1/2" x 5"
1 piece of basic white 3 7/8" x 5 5/8", 1 piece 3 3/8" x 4 7/8", scraps for stamping
Bottled Happiness stamp set
Fresh Freesia ink
Night of Navy ink
Soft Sea Foam ink
Paper snips
Trimmer
Simply scored
Bone Folder
Basic Rhinestones
Multipurpose adhesive
Dimensionals

Instructions

On the long side score the fresh freesia card at 4 1/8" and fold and burnish to make the card base.

Stamp floral images randomly all over the card front using fresh freesia ink.

On the smaller piece of basic white, stamp the floral image towards the top, then add the leaves and fillers in soft sea foam.

Stamp 1 large bottle and two small ones on the scraps of white in each of the colours and fussy cut the images.  Adhere the tall one directly under the flowers as though they are coming out of it and arrange the other two to the sides on dimensionals.

Stamp a sentiment on a strip of basic white using the navy ink and trim as in the photo, add a little dab of adhesive on either end and adhere in place across the bottles.

Stamp another sentiment and some leaves on the remaining white for the inside of the card and adhere in place.
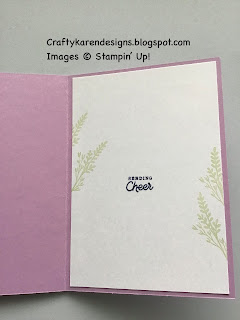

Sprinkle a few rhinestones and the card is complete.

Please pop over to Victoria's Creative Colour Challenge page and see what else is there, maybe join in a challenge yourself, she posts a new one every Monday.

If you would like to see more of my Blog Posts, sign up to my Weekly Newsletter.

If you would like to join my Team or become one of my Discount Shoppers, you can message me on my Facebook Page at www.facebook.com/craftykarendesigns or via the Contact Me box below this Blog.

If you are interested in taking part in some challenges and having crafty chats with like minded people and a bit of a laugh, pop over to Craft and Banter on Facebook (link in the side bar). This group is a collaboration with Taffy Crafting (Donna Lester) and Vickieloudesigns (Victoria Littlewood) and we would love you to join us.

Happy Crafting,


Karen X


Product List

Friday, 6 January 2023

Regency Park Bookbinder Card

 Hi Everyone,


I thought I would use some of the Regency Park designer series paper today for my fun fold card. I like to make bookbinder fun folds, I think they are great for showing off several papers from a set and using small amounts. I've teamed it with the Bottled Happiness stamp set and the Stylish Shapes dies. I hope you like it.

Materials

1 piece of Balmy Blue card stock 4 1/8" x 11 1/2", scrap for the sentiment
2 pieces of dsp 4 1/2" x 3 7/8", 1 piece 3/4" x 3 7/8"
1 piece of basic white 3" square, scrap for the sentiment
Stampin Cut & Emboss Machine
Stylish Shapes dies
Trimmer
Simply Scored
Bone Folder
Multipurpose adhesive
Dimensionals
Night of navy ink
Bottled Happiness stamp set
Starry Sky Ribbon
Mini Glue Dots

Instructions

On the long side score the balmy blue card at 4 3/4" and 5 3/4", fold in half on the 5 3/4" score line and then fold the 4 3/4" one back on itself to book the book opening. Adhere the 1" sections together to form the spine of the book as shown.


Adhere the dsp to the front and inside sections of the card.

Stamp a sentiment on the 3" square piece of white and adhere on the inside of the card.


Stamp a sentiment on the scrap of white and then die cut with the smaller square die and then die cut the next size up in balmy blue. Layer the two together ad add to the centre of the opening flap of the card.

Make a small bow with the glittery ribbon and add to the sentiment with glue dots.

Another quick and easy card showing off the dsp.

Pop over and see what Donna and Victoria have made this week too.


Donna Lester

Victoria Littlewood


If you would like to see more of my Blog Posts, sign up to my Weekly Newsletter.

If you would like to join my Team or become one of my Discount Shoppers, you can message me on my Facebook Page at 

If you are interested in taking part in some challenges and having crafty chats with like minded people and a bit of a laugh, pop over to Craft and Banter on Facebook (link in the side bar). This group is a collaboration with Taffy Crafting (Donna Lester) and Vickieloudesigns (Victoria Littlewood) and we would love you to join us.

Happy Crafting,


Karen X

Product List

Friday, 28 October 2022

Bottled Happiness Gatefold Card - Fun Fold Friday

 Hi Everyone,


I thought that I would make a square card today using colours I don't reach for very often - Mint Macaron, Shaded Spruce and So Saffron. I've teamed them with the Subtles dsp stack, the Bottled Happiness and Charming Sentiments stamp sets. I really like how it turned out.

Materials

1 piece of mint macaron card stock5 7/8" x 11 3/4", 1 piece 4 1/4" x 3 3/8"
1 piece of basic white 4" square, 1 piece 4" x 3 1/4", 2 pieces 2 5/8" x 5 5/8", scrap for sentiment
1 piece of dsp 5 5/8" square, 2 pieces 2 3/8" x 5 3/8"
Shaded Spruce ink
So Saffron ink
Mint Macaron ink
Bottled Happiness stamp set
Charming Sentiments stamp set
Sentiment Silhouette dies
Stampin' Cut & Emboss Machine
Twine
Basic Rhinestones
Trimmer
Simply Scored
Bone Folder
Multipurpose adhesive
Dimensionals
Mini Glue Dots

Instructions

On the long side score the mint macaron card at 2 7/8" from each end, fold and burnish to make the gatefold card.

Add the largest piece of dsp to the inside of the card.  Add the dsp layers to the basic white mats and add to the gates. Stamp a sentiment on the 4" square of white and then adhere inside the card.


Stamp the small bottle in the centre of the remaining white card at the bottom and then add the flowers with the two step stamping using shaded spruce and so saffron.  Adhere this piece to the mint macaron mat layer, add dimensionals to the back of the right hand side only and add to the right gate.


Stamp a sentiment on a scrap of white and then die cut with the corresponding silhouette die and add across the bottom of the bottle using dimensionals.

Tie a small double bow with some twine and add to the neck of the bottle.  Sprinkle some rhinestones for some added bling and the card is complete.

If you would like to see more of my Blog Posts, follow me on Facebook or sign up for a copy of my Weekly Newsletter (emailed out every Monday morning and link copied to my Facebook Pages).

If you would like to join my Team or become one of my Discount Shoppers, you can message me on my Facebook Page at www.facebook.com/craftykarendesigns or via the Contact Me box below this Blog.

f you are interested in taking part in some challenges and having crafty chats with like minded people and a bit of a laugh, pop over to Craft and Banter on Facebook (link in the side bar). This is a new group that some crafty friends and I are trying to get up and running and we would love your company.

Happy Crafting,

Karen


Stamp a sentiment on the square piece of white and add to the inside of the card
Product List