Showing posts with label Double Oval Punch. Show all posts

Thursday, 7 July 2022

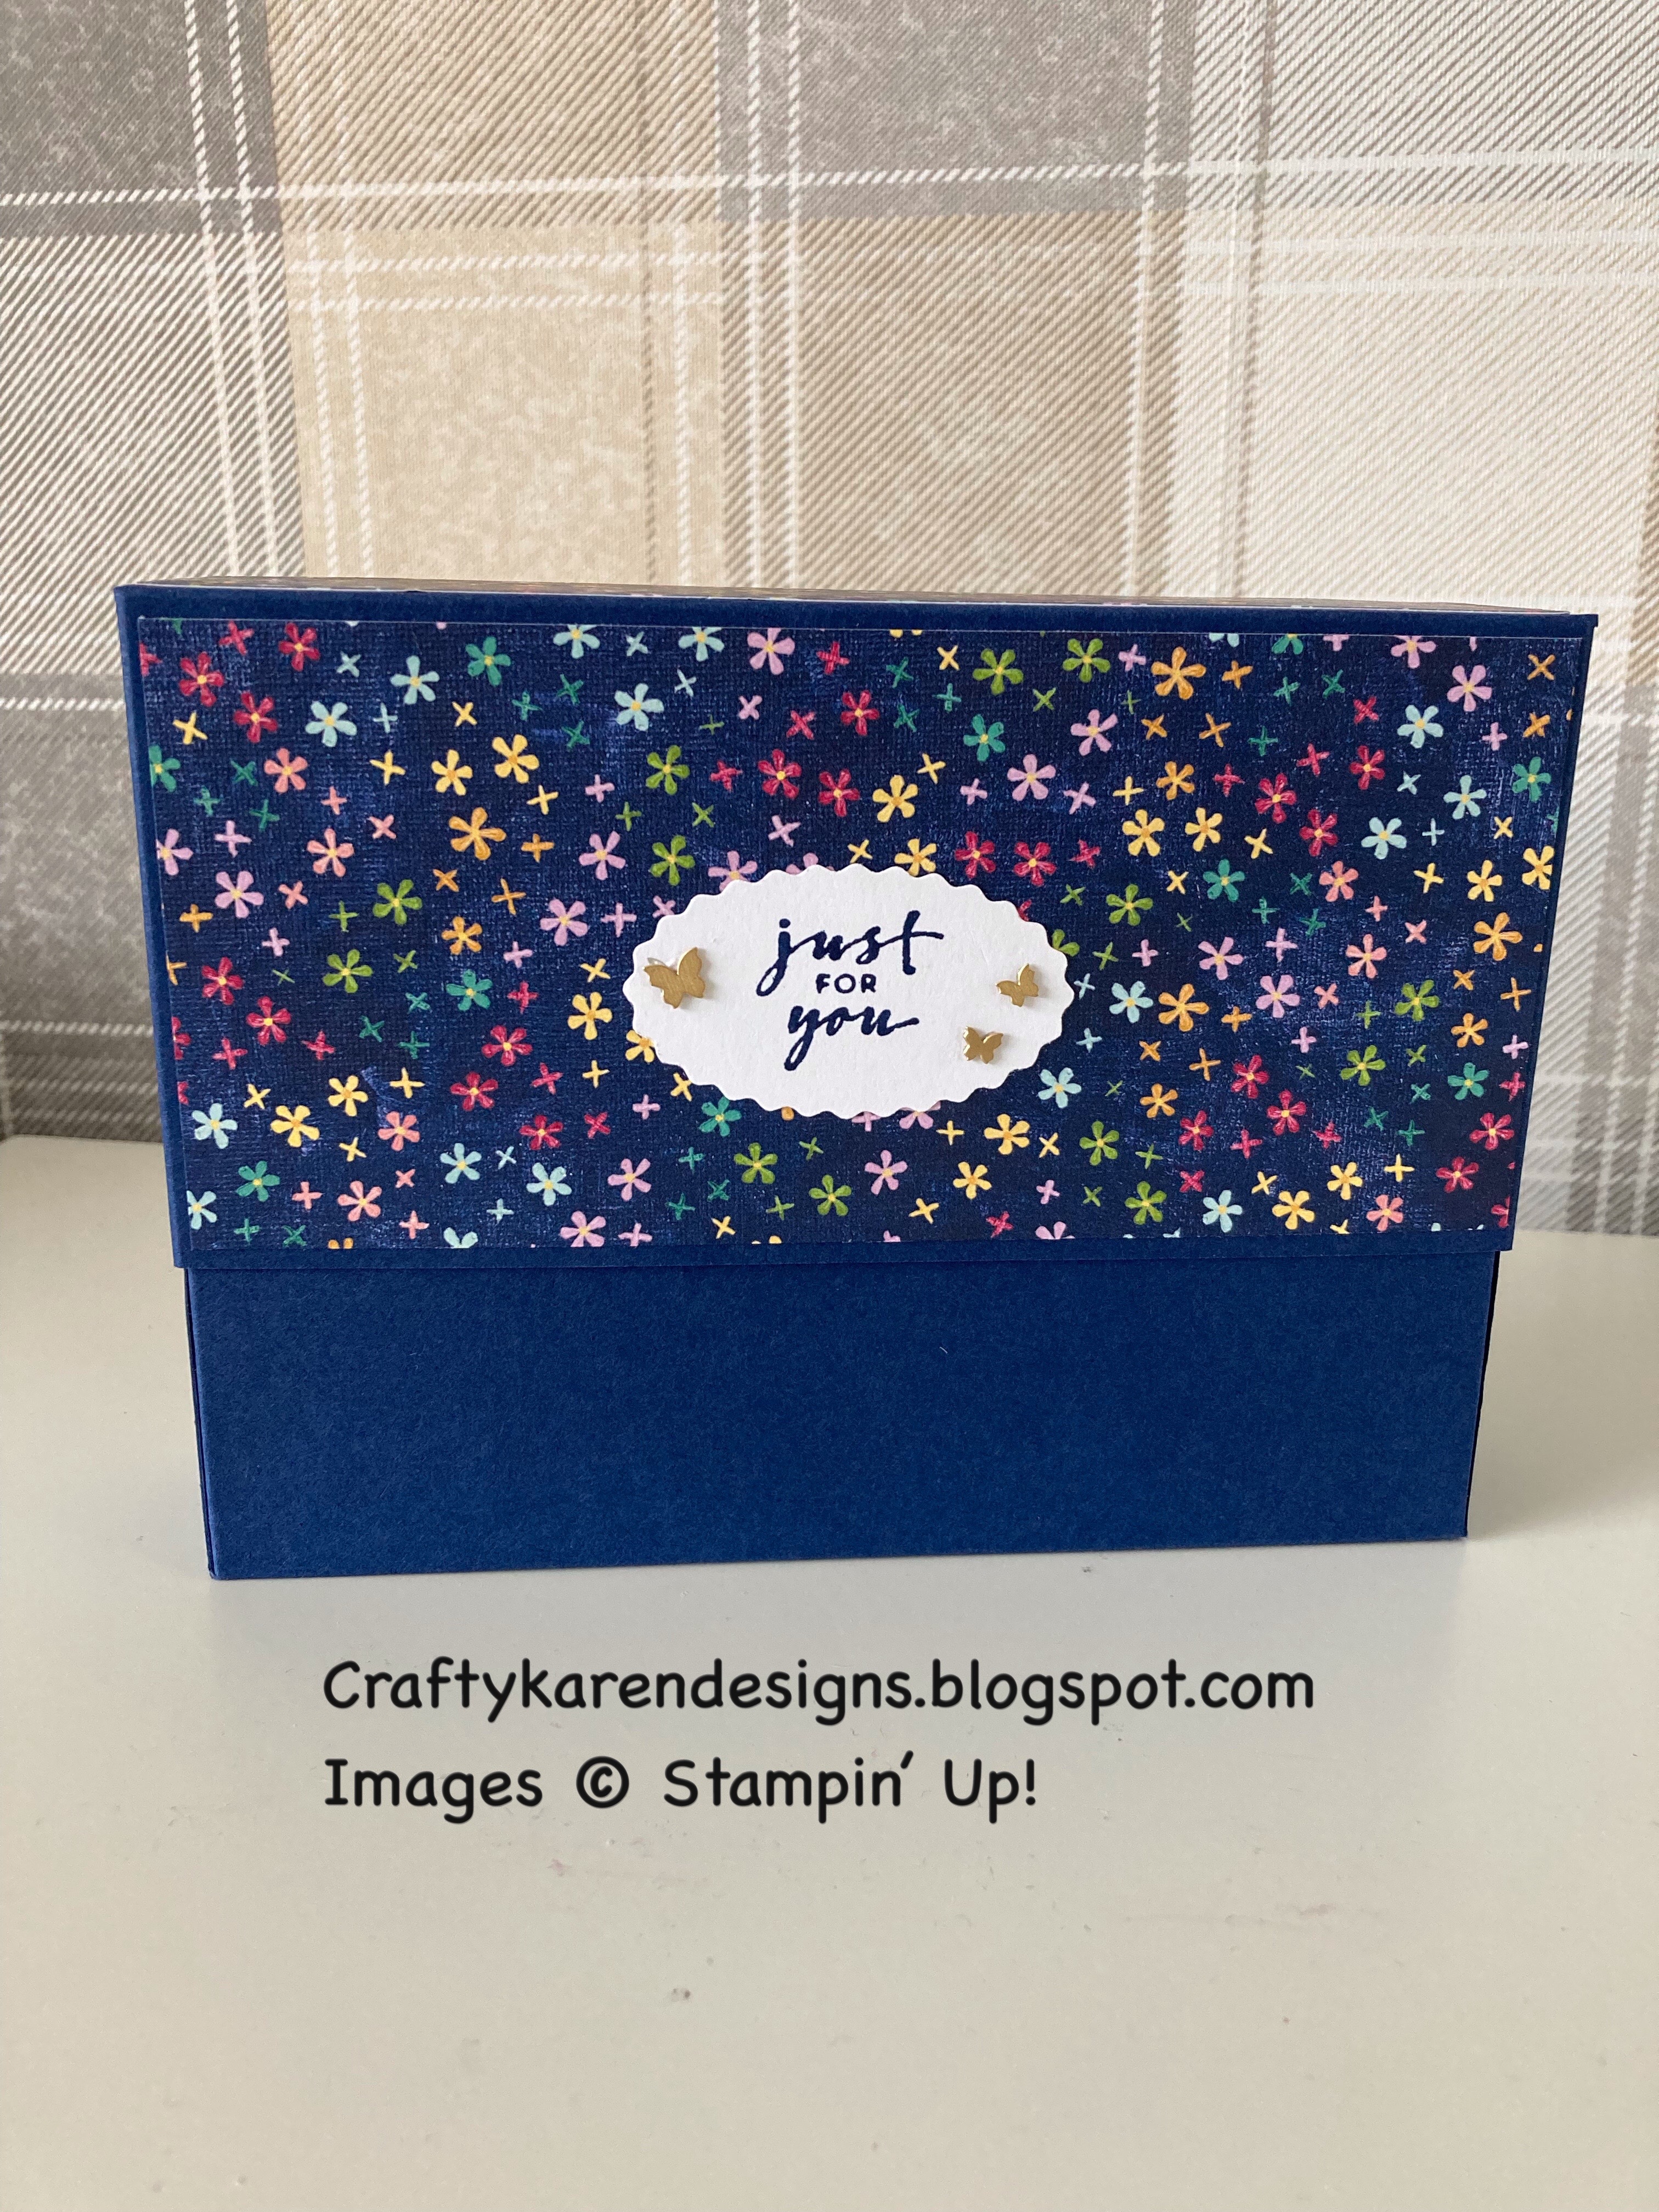
Hues of Happiness Stationery Gift Box

 Hi Everyone,


Today I have a Stationery Gift Box decorated with Hues of Happiness dsp which will contain 4 decorated notecards and envelopes, 4 small cards and 4 gift tags. I've made this as a gift for my Aunt who loves stationery sets like this.  I got the idea from an old video by the very talented Crafty Caroline Creates. Caroline stamped her images but I decided to showcase this fabulous designer series paper. Let me show you how to make it the box. The blog post with the contains will follow soon.

Materials

1 piece of night of navy card stock 7 7/8" x 9 5/8", 1 piece 9 1/2" x 8 1/4", 1 piece 8" x 2" and 1 piece 6" x 2"
1 piece of dsp 1 1/2" x 6 1/2", 2 pieces 3" x 6 1/2"
Trimmer
Simply Scored
Bone Folder
Paper Snips
Multipurpose adhesive
Brushed Brass Butterflies
Night of navy ink
Double Oval Punch
Charming Sentiments stamp set
Take Your Pick Tool

Instructions

Lid - use the piece 7 7/8" x 9 5/8"

On the long side score at 1 1/2", turn and score at 3 1/8", turn and score at 1 1/2", then turn and score at 3 1/8", fold and burnish all the score lines.

Cut up the score lines as shown in the picture. 


Adhere the dsp layers to the lid.

Add glue to the inside of the tab and fold on to the outside of one of the longer tabs.

Then add glue to the inside of the remaining longer tab and adhere over the top to close up the side of the box and enclose the small tab so that it doesn't catch on the contents of the box when you slide it on and off.


As you can see, the side tab doesn't completely cover the previous one, try and make sure that you do both sides in the same order so that they match.


For the Base - use the piece 9 1/2" x 8 1/4"

On the long side score at 1 1/2" and 8", turn to the short side and score at 2" and 3 1/2", fold and burnish all the score lines. Cut up the score lines as shown in the picture.


Glue and fold the side pieces as you did for the lid, enclosing the smaller tab between the others.


For the internal pockets

8" x 2" piece, score on the long side at 3 1/4", 3 3/4", 7" and 7 1/2", turn and score at 1/2" on the short side.

6" x 2" piece, score on the long side at 2 1/4", 2 3/4", 5" and 5 1/2", turn and score at 1/2" on the short side.


Cut the score lines as shown in the picture. Add glue to the side tabs and then bring the opposite side around to meet the fold line and glue in place.  Fold the side tabs in and fold the two longer tabs over the top and glue them in place.


Add glue to the bottom and the front of each piece and adhere to the inside of the box, one at either side against the inside front.


Stamp the sentiment on a scrap of white and punch out with the scalloped punch and add to the front of the box as shown in the picture, add some butterflies.

I will show you how I made the contents in another blog but here is a sneak peek.


Please pop over and see what Donna and Victoria have made this week.

Donna Lester
Victoria Littlewood


If you would like to see more of my Blog Posts, sign up to my Weekly Newsletter.


New Class in the Mail

Click on the link in the side bar for more details.


If you would like to join my Team or become one of my Discount Shoppers, you can message me on my Facebook Page at www.facebook.com/craftykarendesigns or via the Contact Me box below this Blog.

If you are interested in taking part in some challenges and having crafty chats with like minded people and a bit of a laugh, pop over to Craft and Banter on Facebook (link in the side bar). This group is a collaboration with Taffy Crafting (Donna Lester) and Vickieloudesigns (Victoria Littlewood) and we would love you to join us.

Happy Crafting,


Karen X


Product List

Monday, 23 May 2022

Retro Perfectly Pencilled - Creative Colour Challenges #38

 Hi Everyone,


I'm taking part in another of Victoria's colour challenges today and I've done some colouring (I know, not my usual style) and I've taken a bit or artistic licence and added in a bit of green (couldn't have naked leaves, they just didn't look right). I think it looks a bit like retro wallpaper, I can imagine this on my Gran's bedroom wall.

This week's colours are:


Materials

1 piece of blackberry bliss card stock 5 7/8" x 8 1/4", scrap for the sentiment
1 piece of basic white 3 7/8" x 5 5/8", scrap for the sentiment
1 piece of Perfectly pencilled dsp 3 7/8" x 5 5/8"
Calypso Coral Stampin' Blends
Blackberry Bliss Stampin' Blends
Night of Navy Stampin' Blends
Night of Navy ink
Granny Apple Green Stampin' Blends
Double Oval Punch
Celebrating You stamp set
Basic Rhinestones
Trimmer
Bone Folder
Take Your Pick Tool
Multipurpose Adhesive
Dimensionals

Instructions

On the long side score the blackberry card at 4 1/8" and fold and burnish to make the card base.

Colour in the images on the dsp using Stampin' Blends (you can also use Watercolour Pencils or inks and a Blender Pen - I will add links to those below in case you are interested).

Adhere the dsp to the card front.

Stamp a sentiment on a scrap of basic white and punch out. Punch out a scalloped layer from blackberry bliss and adhere them together and mount on the card front with dimensionals.

Stamp a sentiment on the remaining piece of white and adhere to the inside of the card.

I've added rhinestones as the flower centres and a couple to the sentiment as well.

Colour Challenges can be great fun, why don't you pop over to Victoria's Blog and give it a try for yourself, she would be very happy to see you.


If you would like to see more of my Blog Posts, sign up to the email alert over in the right hand side bar of the page.

If you would like to join my Team or become one of my Discount Shoppers, you can message me on my Facebook Page at www.facebook.com/craftykarendesigns or via the Contact Me box below this Blog.

If you are interested in taking part in some challenges and having crafty chats with like minded people and a bit of a laugh, pop over to Craft and Banter on Facebook (link in the side bar). This is a new group that some crafty friends and I are trying to get up and running and we would love your company.

Happy Crafting,


Karen X


Product List

Thursday, 12 May 2022

Perfectly Pencilled Notebook - Stampin' Birds 3D Thursday

Hi Everyone,


It's another Birds challenge today and this time I have made a covered notebook with a holder for a pen using the lovely perfectly pencilled dsp and the Lovely You stamp set.  This dsp is great for colouring and I've used Stampin' Blends, it's just a small amount for this so didn't take long. These are great for customer gifts, teacher gifts and craft fairs, I used to sell lots of these when I did craft fairs. Let me show you how I made it.

Materials


Mini notebook (I have used one which is 4" tall x 3 1/4" wide)
Mini gel pen or pencil (upto 4" tall)
1 piece of basic black cardstock 4" x 7 5/8"
1 piece of  Perfectly Pencilled dsp 3 3/8" x 3 3/4" (for the back)
1 piece Perfectly Pencilled dsp 3" x 3 3/4" (for the front)
Scraps of cardstock for the sentiment
Lovely You stamp set
Double Oval Punch
Polished Pink Stampin' Blends
Granny Apple Green Stampin' Blends
Daffodil Delight Stampin' Blends
Polished Pink ink
Classic Matt Dots
Trimmer
Bone folder
Paper Snips
Multipurpose Adhesive
Dimensionals

Instructions

On the long side score the basic black at 3 5/8", 4" and 4 3/8" and then fold and burnish the score lines.

Fold in half on the centre score line and make two cuts about 1" apart from the fold to the score line - this is for the pen. Fold as in the picture to pop out the pen holder and then  adhere the bottom layer down and slide the pen in to keep in place.


Add some adhesive to the back of the pad and adhere in place on the inside of the little holder.

Add the dsp layer to the back and then colour in the images for the front piece and adhere in place.  

Stamp a sentiment on a scrap of white and punch out with the smaller oval and layer up on a scalloped black oval and add to the front of the notebook with dimensionals.

Add some matt black dots for decoration and it's complete, I hope that you like it. Please pop over and see what Donna and Victoria have made too:


Donna Lester


Victoria Littlewood

If you would like to see more of my Blog Posts, sign up to the email alert over in the right hand side bar of the page.

If you would like to join my Team or become one of my Discount Shoppers, you can message me on my Facebook Page at www.facebook.com/craftykarendesigns or via the Contact Me box below this Blog.

If you are interested in taking part in some challenges and having crafty chats with like minded people and a bit of a laugh, pop over to Craft and Banter on Facebook (link in the side bar). This is a new group that some crafty friends and I are trying to get up and running and we would love your company.

Happy Crafting,


Karen X


Product List