Showing posts with label In-Colours 2022-2024. Show all posts

Saturday, 14 May 2022

Sweet Sorbet Colour & Contour - Stamping Inkspirations Blog Hop - Sketch Challenge

Hi Everyone,


My card for today was inspired by one of the fabulous new 2022-2024 In Colours, it's called Sweet Sorbet. I've teamed it with my favourite Gingham Embossing Folder and the Colour & Contour and Art Gallery stamp sets.  I've used the Sweet Sorbet card stock, designer series paper and the ink. I hope that you like my interpretation of the sketch challenge.


Materials

1 piece of thick basic white card 5 7/8" x 8 1/4"
1 piece of basic white 2 5/8" x 3 1/2", 1 piece 2" x 3" and a scrap for the sentiment
1 piece of sweet sorbet card stock 3 7/8" x 5 5/8", scrap for the sentiment layer
1 piece of sweet sorbet dsp stack 2 3/8" x 3 1/4"
Colour & Contour stamp set
Art Gallery stamp set
Memento Black ink
Sweet Sorbet ink
Multipurpose adhesive
Dimensionals
Gingham Embossing Folder
Stampin' Cut & Emboss Machine
Trimmer
Bone Folder 
Basic Rhinestones

Instructions

On the long side score the thick white card at 4 1/8" and fold and burnish to make the card base.

Run the sweet sorbet layer through the machine in the Gingham Embossing Folder and adhere to the card front.

Add the dsp layer to the larger of the white mat layers and add to the card base using dimensionals and position in the lower right corner of the card front.

Stamp the floral image in memento black and add to the dsp panel.

Stamp the sentiment on a scrap of white using Sweet Sorbet ink and layer up on the scrap of coloured card and add to the card using dimensionals.

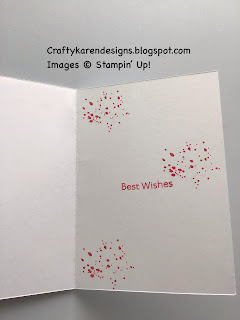
Stamp a sentiment and some decoration on the inside of the card and then sprinkle some rhinestones across the card front.

I hope that you like my card, please pop over and see what everyone else has made too.

If you would like to see more of my Blog Posts, sign up to the email alert over in the right hand side bar of the page.

If you would like to join my Team or become one of my Discount Shoppers, you can message me on my Facebook Page at www.facebook.com/craftykarendesigns or via the Contact Me box below this Blog.

If you are interested in taking part in some challenges and having crafty chats with like minded people and a bit of a laugh, pop over to Craft and Banter on Facebook (link in the side bar). This is a new group that some crafty friends and I are trying to get up and running and we would love your company.

Happy Crafting,


Karen X


Product List

Friday, 6 May 2022

Perfectly Pencilled Sweet Sorbet Centre Panel Card - Stampin' Birds Fun Fold Friday

Hi Everyone,


It's a while since I've done a Fun Fold Friday but Stampin' Birds are bringing it back for the month of May.  This week I have made a Centre Panel card with the Perfectly Pencilled and In-Colour dsp stack and lots of colouring. Let me show you how I made it.

Materials

1 piece of sweet sorbet card stock 5 7/8" x 8 1/4", scrap for the sentiment
1 piece of basic white card 2 7/8" x 5 5/8", scrap for the sentiment
1 piece of Perfectly Pencilled dsp 2 7/8" x 5 5/8", scrap with larger flowers to fussy cut
2 pieces of In-Colour dsp 1 1/4" x 5 5/8" and 2 pieces 1 1/8" x 5 5/8"
Sweet Sorbet ink
Parakeet Party ink
Orchid Oasis ink
Memento Black ink
Scalloped Contour Dies
Stampin' Cut & Emboss Machine
Blender Pen
Iridescent Rhinestones
Multipurpose Adhesive
Dimensionals
Trimmer
Simply Scored
Bone Folder
Take Your Pick Tool
Paper Snips

Instructions

On the long side score the card stock at 1 3/8" and 2 5/8" from either end, fold and burnish to make the card base (valley, mountain, mountain, valley).

Adhere the In-Colour strips to the side panels.

Colour all the images on the Perfectly Pencilled dsp that you have chosen. I don't have the Stampin' Blends yet so I have used the ink pads and the Blender Pen.  Adhere this layer to the centre panel.

Colour in two larger sets of flowers and leaves and then fussy cut them.

Die cut the two smallest scalloped rectangles, one in sweet sorbet, the other in white. Stamp the sentiment on the white layer and then add to the sweet sorbet with dimensionals.  Add this to the middle of the centre panel using dimensionals.  Then add the fussy cut flowers to the corners using dimensionals.

Stamp a sentiment on the remaining white layer and add to the back of the centre panel to write your message.

Add rhinestones to the centre of the larger flowers and also to some of the smaller ones too.

Another quick and easy fun fold card, I hope that you like it. Please pop over and see what Donna and Victoria have made too.


Donna Lester

Victoria Littlewood


If you would like to see more of my Blog Posts, sign up to the email alert over in the right hand side bar of the page.

If you would like to join my Team or become one of my Discount Shoppers, you can message me on my Facebook Page at www.facebook.com/craftykarendesigns or via the Contact Me box below this Blog.

If you are interested in taking part in some challenges and having crafty chats with like minded people and a bit of a laugh, pop over to Craft and Banter on Facebook (link in the side bar). This is a new group that some crafty friends and I are trying to get up and running and we would love your company.

Happy Crafting,


Karen X


Product List

Thursday, 5 May 2022

Diagonal Hinged Lid Treat Box - Stampin' Birds 3D Thursday

 Hi Everyone,


The second Stampin' Birds Challenge for this week is a 3D project, I've made a diagonal hinged lid treat box using the lovely new Sweet Sorbet, I wanted to show off one of the new 2022-2024 In-Colours. There are lots of these sorts of boxes on Pinterest and YouTube and I'm not sure where I saw it first. Let me show you how I made it.

Materials

1 piece of sweet sorbet card stock 6" x 4 1/2", scrap for the sentiment
1 piece of sweet sorbet designer series paper 6" x 4 1/2"
Scraps of basic white and gold foil
In-Colour Bakers Twine to wrap around the box
Bough Punch
Flowers & Leaves Punch
Sweet Sorbet ink
Gilded Gems
Trimmer
Simply Scored
Bone Folder
Paper Snips
Shaded Summer stamp set
Flowers of Friendship stamp set
Multipurpose adhesive
Tear and Tape
Mini Glue Dots

Instructions

Score the card stock and dsp at 1 1/2" on all 4 sides 

On the dsp, draw a diagonal line as shown on the two outer, centre rectangles. Then cut as shown. Trim the tabs as shown in the photos, this is just to reduce the bulk so doesn't have to be a specific measurement, the card stock version needs two short and two longer (see picture).

Add tear and tape to the tabs on the dsp one as shown and then fold them in the make a box end, making sure that the cut edges line up with the folded edges. The other end is the hinge which will attach to the card stock box.

Add tear and tape to the tabs on the card stock now and make up the end with the shorter tabs.  Then before sealing the other end, line up  the dsp hinge piece and then fold over the last square piece and seal that end.


The box is now ready to fill with sweets and decorate.


I have tied In Colour twine around the box and tied a bow. Then Punch out a large scalloped oval in sweet sorbet and a smaller white one to stamp on. Stamp a sentiment from Shaded Summer and layer the two together.

Punch out a gold foil bough and stamp and punch out two of the smaller flowers from Flowers of friendship. Tuck the leaves under the twine and the adhere the sentiment label, tucked under the ribbon and just glued at one end.  Add the two flowers and then add gilded gems for decoration.


I hope that you like my little box, please pop over and see what Donna and Victoria have made too.


Donna Lester

Victoria Littlewood

If you would like to see more of my Blog Posts, sign up to the email alert over in the right hand side bar of the page.

If you would like to join my Team or become one of my Discount Shoppers, you can message me on my Facebook Page at www.facebook.com/craftykarendesigns or via the Contact Me box below this Blog.

If you are interested in taking part in some challenges and having crafty chats with like minded people and a bit of a laugh, pop over to Craft and Banter on Facebook (link in the side bar). This is a new group that some crafty friends and I are trying to get up and running and we would love your company.

Happy Crafting,


Karen X

Product List