Showing posts with label Framed Florets. Show all posts

Saturday, 4 February 2023

Regency Park Pop Up Birthday Card - Stamping With Friends Blog Hop

 Hi Everyone,


The theme is 'Pop Up' and I've brought out the lovely Regency Park designer series papers again, I just love them. I've teamed them with the Framed Florets dies and stamp set for a really pretty card for my friend.

Materials

1 piece of night of navy card stock 5 7/8" x 8 1/4", scraps for die cuts
3 pieces of dsp 3 7/8" x 5 5/8", scraps to die cut flowers and leaves
1 piece of basic white card 3" x 4 1/4", scraps for the stamping and die cuts
Scraps of shaded spruce for the leaves
Bough Punch
Petal Park stamp set
Petal Park Builder Punch
Framed Florets dies
Stampin' Cut & Emboss Machine
Paper snips
Night of navy ink
Balmy blue ink
Sweet sorbet ink
Petal pink ink
Fine sparkle adhesive backed gems
Trimmer
Simply scored
Bone Folder
Multipurpose adhesive
Stampin dimensionals

Instructions

On the long side score the night of navy card at 4 1/8" and fold and burnish to make the card base.

Adhere the dsp layers to the front and both sections of the inside.

On the long side score the basic white at 1/4", 1 1/4", 2 1/4", 3 1/4" fold and burnish, this forms the stand for the pop up to be adhered to.
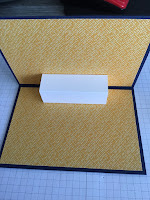
Run some adhesive along the outside of the 1/4" tab, fold down on the 1 1/4" tab and bring the other end over to meet it to form a tube. Adhere this in place in the centre of the card, attaching to both sections of the inside of the card.


Die cut three of the framed ovals in basic white and 3 in night of navy so that you can use the white centres inside the navy frames, set the others aside for another card.

Stamp sentiments on all three white ovals using night of navy ink.

Stamp some flowers using the darker colour for the outline and then the paler colours for the infill. Punch these flowers out. Punch some leaves using the Bough Punch and the Petal Park  Builder Punch.


Fussy cut some additional flowers and leaves from the dsp for decorating the ovals.

Arrange the stamped flowers and punched out leaves on the tube, add some with adhesive and the smaller ones with mini dimensionals to give some depth to the display.

Adhere one navy oval behind the floral display and one on the base of the card below the display and then add the white ovals inside them.  Decorate with some of the fussy cut items.

Add the remaining oval to the front of the card with the remaining sentiment oval and decorate with some of the flowers and add some gems.


The finished card can be displayed standing as normal or open to show off the pop up flowers on the side.

Please pop over and see what everyone else has been making, I'm sure that you will be inspired, I always am.

If you would like to see more of my Blog Posts, sign up to my Weekly Newsletter.

If you would like to join my Team or become one of my Discount Shoppers, you can message me on my Facebook Page at www.facebook.com/craftykarendesigns or via the Contact Me box below this Blog.

If you are interested in taking part in some challenges and having crafty chats with like minded people and a bit of a laugh, pop over to Craft and Banter on Facebook (link in the side bar). This group is a collaboration with Taffy Crafting (Donna Lester) and Vickieloudesigns (Victoria Littlewood) and we would love you to join us.

Happy Crafting,


Karen X


Product List

Sunday, 22 January 2023

Dainty Flowers Birthday Card - Share it on a Sunday

 Hi Everyone,


For Share it on a Sunday I have been playing with the gorgeous panels in the Dainty Flowers designer series paper which is FREE (with a £45 purchase) during Sale-a-Bration. These panels make card making so simple anyone can do it. Let me show you how I made it.

Materials

1 piece of old olive card stock 5 7/8" x 8 1/4", 1 piece 3 1/2" x 5 1/8"
1 piece of dsp 4" x 5 5/8", 1 panel trimmed to 3 3/8" x 5"
1 piece of basic white 3 7/8" x 5 5/8"
Rich Razzleberry ink
Framed Florets stamp set
Old olive ink
Trimmer
Simply Scored
Bone Folder
Multipurpose adhesive

Instructions

On the long side score the old olive card at 4 1/8" and fold and burnish to make the card base.

Add the largest piece of dsp to the card front.

Stamp a sentiment in the centre of the floral panel and then adhere this panel to the remaining old olive mat and then add that to the card front.

Stamp a sentiment and I added some leaves as well to the remaining white mat and adhere to the inside of the card.

Pop over and see what Donna and Victoria have made too:


Donna Lester

Victoria Littlewood

If you would like to see more of my Blog Posts, sign up to my Weekly Newsletter.

If you would like to join my Team or become one of my Discount Shoppers, you can message me on my Facebook Page at www.facebook.com/craftykarendesigns or via the Contact Me box below this Blog.

If you are interested in taking part in some challenges and having crafty chats with like minded people and a bit of a laugh, pop over to Craft and Banter on Facebook (link in the side bar). This group is a collaboration with Taffy Crafting (Donna Lester) and Vickieloudesigns (Victoria Littlewood) and we would love you to join us.

Happy Crafting,


Karen X


Product List

Tuesday, 8 November 2022

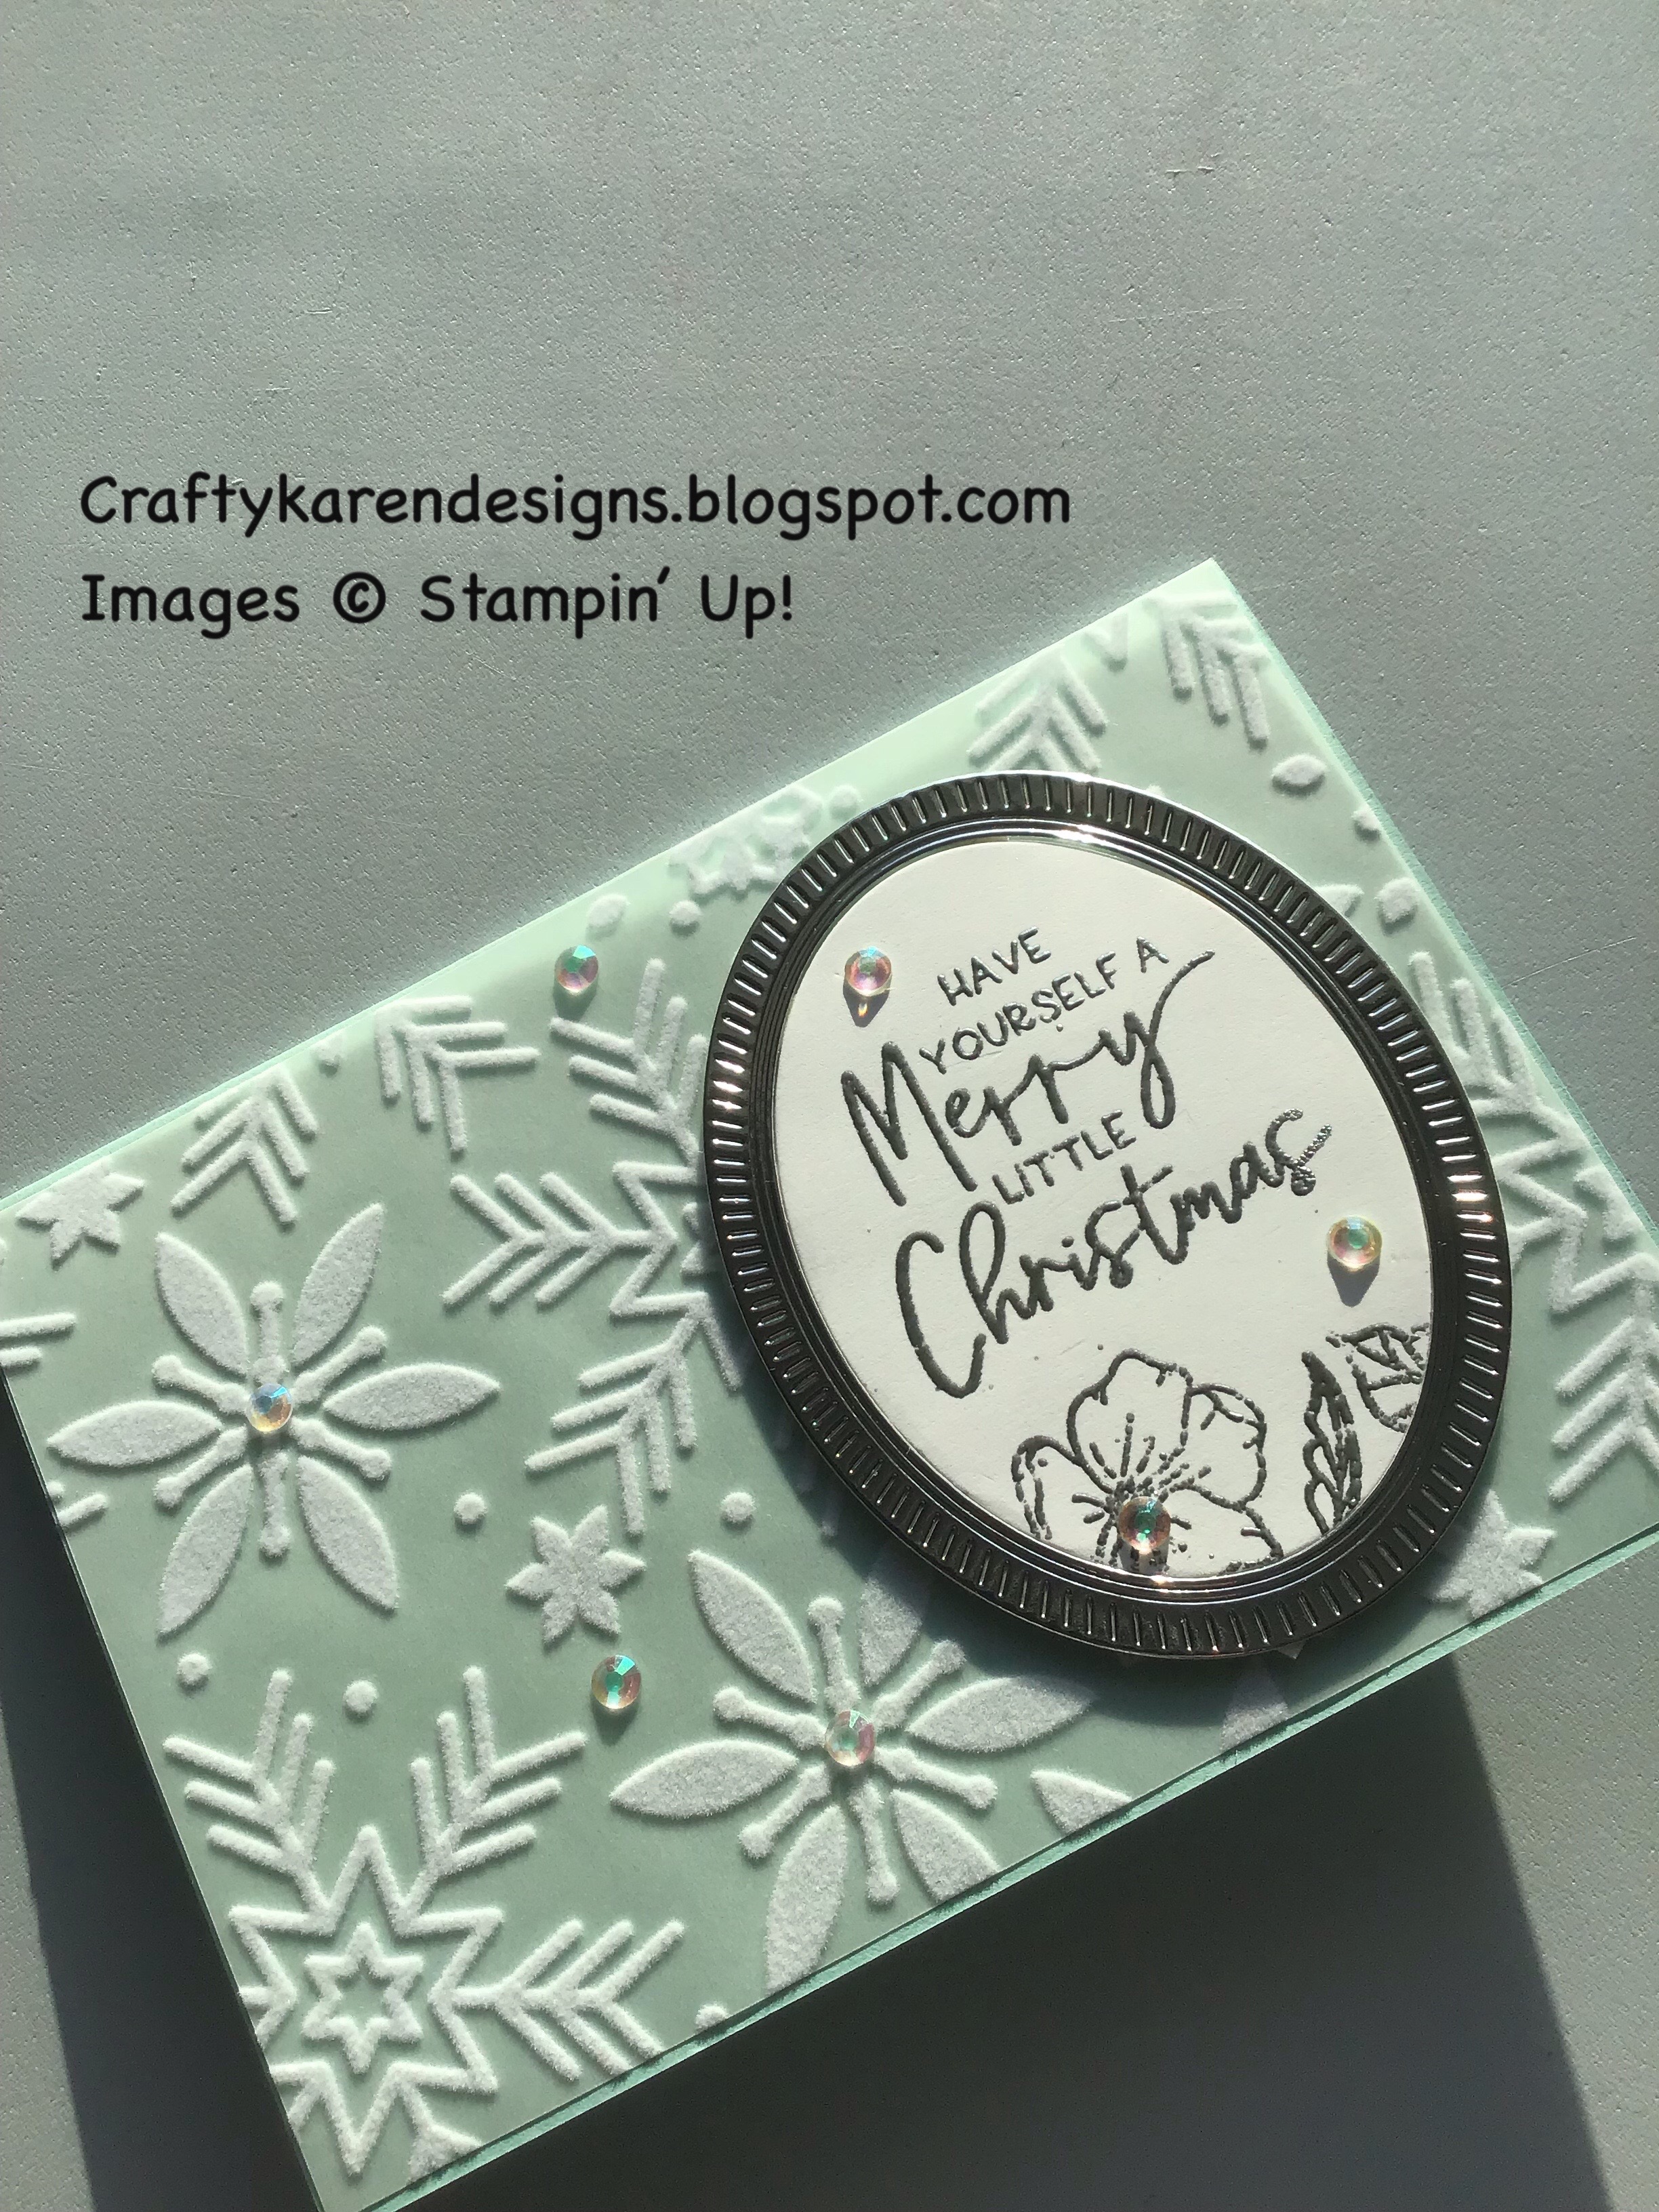
Framed & Festive Snowflake Speciality Vellum Christmas Card

 Hi Everyone,


Today I've been playing with the Framed & Festive stamp set and teamed it with the lovely Snowflake Speciality Vellum and some heat embossing to make a pretty Christmas card.

Materials

1 piece of pool party card stock 5 7/8" x 8 1/4"
1 piece of Snowflake Speciality Vellum 4" x 5 3/4"
1 piece of basic white card 3 7/8" x 5 5/8"
Scraps of silver foil and basic white for the sentiment frame and mat
Framed & Festive stamp set
Metallics Embossing Powder
Heat Tool
Versamark
Framed Florets stamp set
Framed Florets dies
Stampin' Cut & Emboss machine
Iridescent rhinestones
Trimmer
Simply Scored
Bone folder
Multipurpose adhesive
Dimensionals


Instructions

On the long side score the pool party card at 4 1/8" and fold and burnish to make the card base.

Add the vellum to the card front by adding spots of glue on the back of the solid images, don't add anywhere on the see through sections, it will show.

Die cut a silver foil and a basic white frame and use the silver frame with the white oval and save the other combination for another card.

Stamp a sentiment on the oval using the Versamark and also on the white mat layer for the inside, add some flowers to both.  Sprinkle with silver embossing powder and melt with the heat tool.

Add the oval and the frame together by flipping over and adding dimensionals across the join between the two at intervals all around the edge, add a couple in the centre too.

Add this to the card front and add some rhinestones (see picture).

Adhere the remaining piece of white to the inside and the card is complete.


If you would like to see more of my Blog Posts, follow me on Facebook or sign up for a copy of my Weekly Newsletter (emailed out every Monday morning and link copied to my Facebook Pages).

If you would like to join my Team or become one of my Discount Shoppers, you can message me on my Facebook Page at www.facebook.com/craftykarendesigns or via the Contact Me box below this Blog.

f you are interested in taking part in some challenges and having crafty chats with like minded people and a bit of a laugh, pop over to Craft and Banter on Facebook (link in the side bar). This is a new group that some crafty friends and I are trying to get up and running and we would love your company.

Happy Crafting,

Karen


Product List