Monday 30 May 2022

In Colour Thank You Cards - Crafty Collaborations Blog Hop

 Hi Everyone,


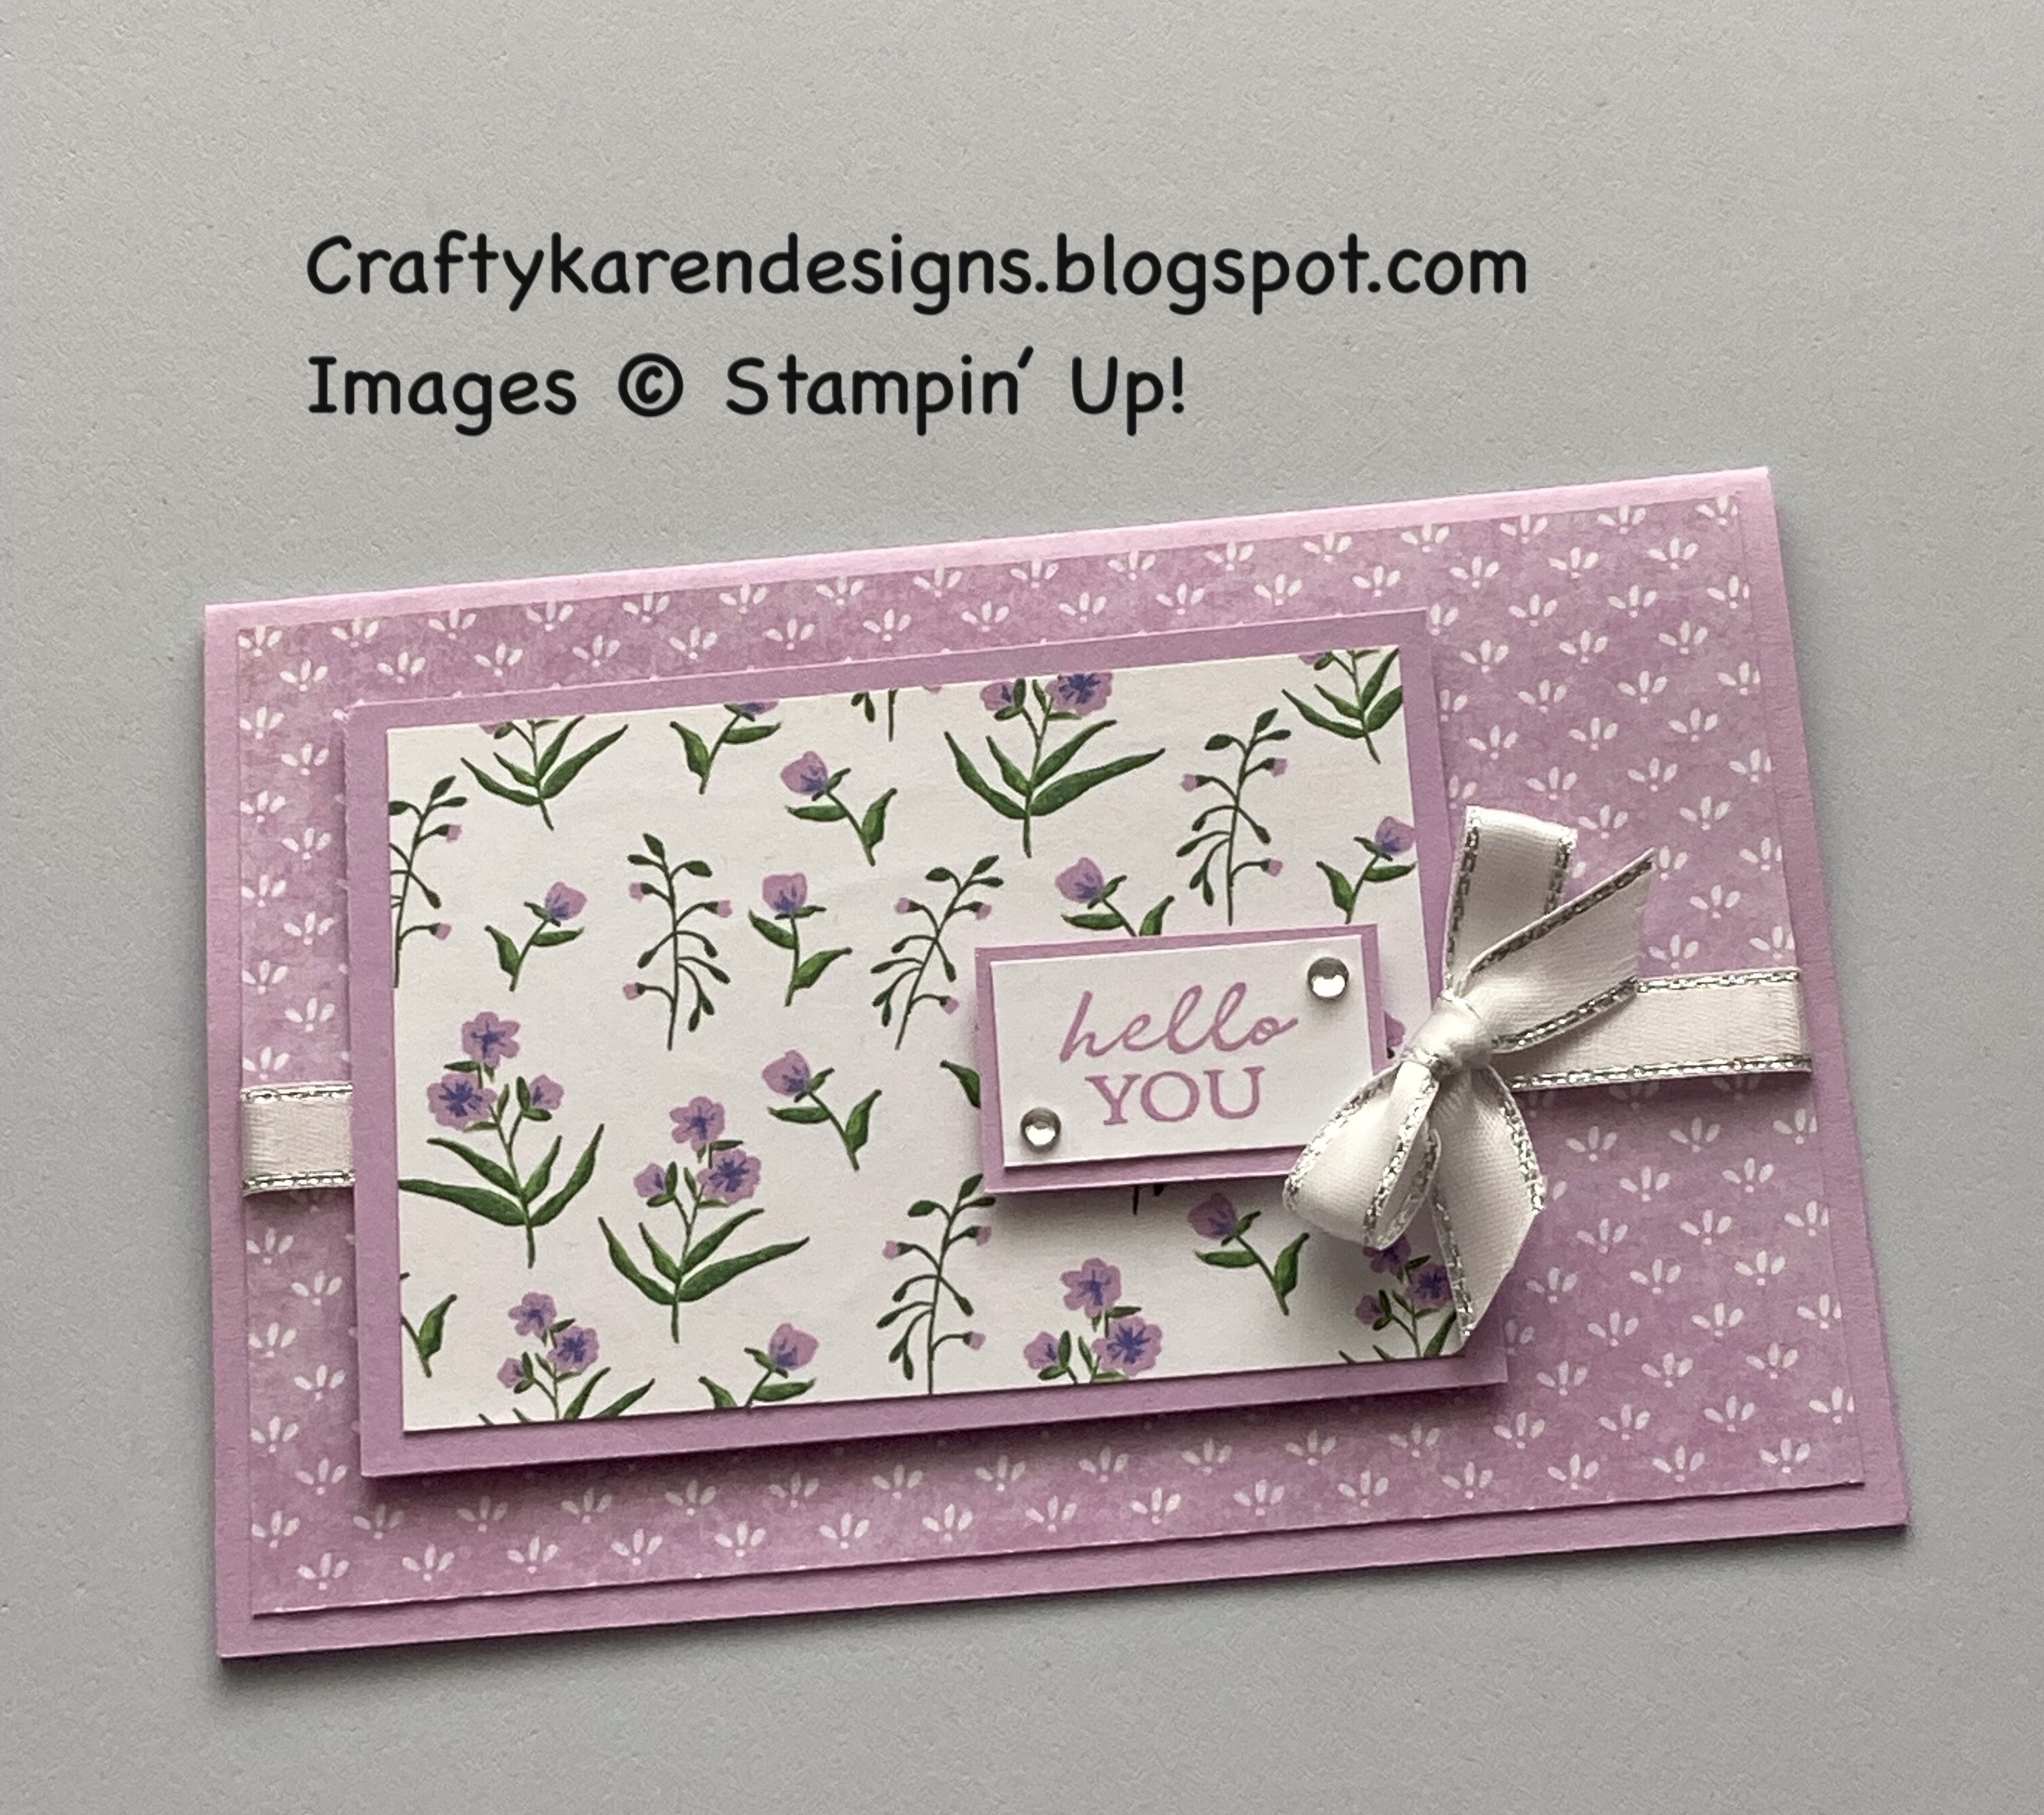
Today I am hopping with the Crafty Collaborations group and we are showing off the new 2022-2024 In Colours - Parakeet Party, Sweet Sorbet, Orchard Oasis, Starry Sky and Tahitian Tide and I love them all, they are so bright and cheerful.  I've used the In Colour inks, card stock and dsp and twine and added a sentiment from Flowers of Friendship and used the Heart Punch Pack for my sentiments.  I am going to use these as my Customer Appreciation Cards for May, I hope that they will like them.

Materials 

For one card (I obviously made 5)

1 piece of thick white card stock 4" x 8"
1 piece of coloured card stock 3 1/4" square
1 piece of In Colour dsp 3" square
Scrap of white card stock for the heart
Ink to match
Heart Punch
In Colour Twine to match
Iridescent Rhinestones
Trimmer
Simply Scored
Bone Folder
Flowers of Friendship stamp set
Multipurpose adhesive
Dimensionals
Mini glue dots

Instructions

On the long side score the thick white card at 4" and fold and burnish.

Add the dsp layer to the coloured mat layer and add to the card front.

Stamp a sentiment in ink to match the coloured card and dsp and punch out with the heart punch.  Add this to the card front using dimensionals.

Tie a bow with a double length of twine and add to the heart with a mini glue dot, then add a rhinestone and the card is done.  I have left the inside clear so that my customers can reuse the card if they want to, I will add a message separately on a post it note.

Please pop over and see what everyone else has made, you are sure to find lots of inspiration, I always do.

If you would like to see more of my Blog Posts, sign up to the email alert over in the right hand side bar of the page.

If you would like to join my Team or become one of my Discount Shoppers, you can message me on my Facebook Page at www.facebook.com/craftykarendesigns or via the Contact Me box below this Blog.

If you are interested in taking part in some challenges and having crafty chats with like minded people and a bit of a laugh, pop over to Craft and Banter on Facebook (link in the side bar). This is a new group that some crafty friends and I are trying to get up and running and we would love your company.

Happy Crafting,


Karen X

Product List

Saturday 28 May 2022

Celebrating You With Butterfly Kisses - Ink, Stamp Share Blog Hop

 Hi Everyone,


Today I am hopping with the Ink, Stamp, Share group and the theme is 'Celebration' and I have used the Butterfly Kisses dsp and the Celebrating You stamp set and the Let's Celebrate Embossing Folders.  I've made a card for a very special young lady - my eldest Grandaughter. Here in the UK it is exam season for high school children and she has been working so hard revising for her exams all year, she deserves to do really well.  She is also my little crafting buddy and likes to make cards and sew with me too so I'm looking forward to the exams being over and us being able to spend some crafty time together.

Materials

1 piece of night of navy card stock 4 1/8" x 11 1/2", 1 piece 1 3/4" x 3 1/4"
1 piece of fresh freesia card stock 3 3/4" x 3 7/8", 2 pieces 1 3/4" x 3 7/8", 1 piece 5 1/4" x 3 7/8"
1 piece of basic white card stock 5" x 3 5/8"
1 piece of dsp 3 1/2" x 3 5/8", 2 pieces 1 1/2" x 3 5/8", scraps to fussy cut some butterflies
Night of navy ink
Let's Celebrate Embossing Folders
Stampin' Cut & Emboss Machine
Paper snips
Celebrating You stamp set
Trimmer
Simply Scored
Multipurpose adhesive
Dimensionals

Instructions

On the long side score the navy card at 4" and 9 1/2" and fold and burnish to make the card base.

Add the mats and layers to the front and inside front of the card, I've used the reverse of one piece as a contrast.

Stamp a sentiment on the white card and adhere to the inside of the card.

Run the small piece of navy through the machine in the Embossing Folder, I chose the piece that had the word 'Bravo'.  Add this to the centre of the card front overlapping the narrower side of the gatefold.

Fussy cut some butterflies, I've added two using dimensionals to the sentiment layer and adhered a whole one and a partial image on the inside.

I do hope she likes it, I'm going to give it her at the end of the exams, we won't know how she's done until the summer but I'm very proud of her whatever happens.

Please pop over and see what everyone else has been making too.

If you would like to see more of my Blog Posts, sign up to the email alert over in the right hand side bar of the page.

If you would like to join my Team or become one of my Discount Shoppers, you can message me on my Facebook Page at www.facebook.com/craftykarendesigns or via the Contact Me box below this Blog.

If you are interested in taking part in some challenges and having crafty chats with like minded people and a bit of a laugh, pop over to Craft and Banter on Facebook (link in the side bar). This is a new group that some crafty friends and I are trying to get up and running and we would love your company.

Happy Crafting,


Karen X


Product List

Tea Boutique in Fresh Freesia - Stampin' Birds Showcase Blog Hop

 Hi Everyone,


I needed a quick card today just to drop a line to a friend I haven't seen for a while. I've teamed the Tea Boutique dsp with the Shaded Summer stamp set and Fresh Freesia and used an old favourite layout which shows off a couple of different patterns.

Materials

1 piece of fresh freesia card stock 5 7/8" x 8 1/4", 1 piece 3" x 4" and a scrap for the sentiment
1 piece of basic white 3 7/8" x 5 5/8", scrap for the sentiment
1 piece of dsp 3 7/8" x 5 5/8", 1 piece 2 3/4" x 3 3/4"
Scraps of ribbon
Shaded Summer stamp set
Fresh Freesia ink
Trimmer
Simply Scored
Bone Folder
Multipurpose adhesive
Dimensionals
Mini Glue Dots
Basic Rhinestones

Instructions

On the long side score the fresh freesia card at 4 1/8" and fold and burnish to make the card base.

Wrap the ribbon around the larger dsp layer and secure on the back with some tape. Adhere this layer to the card front.

Add the small piece of dsp to the mat layer and add to the card front, over the ribbon using dimensionals.

Stamp a sentiment on a scrap of white and then trim and layer up on a slightly bigger piece of the fresh freesia and add to the card front as shown.

Stamp a sentiment/decorate the remaining piece of white card ad add to the inside of the card.

Tie a small bow and add to the side of the sentiment with a glue dot and add a couple of rhinestones for some added bling.

I do hope that you like my quick card, I use this layout a lot, it's great for batch making cards too and looks great in lots of different colour and dsp combinations.

Please pop over and see what my Team Mates have made too, Bec is up next


If you would like to see more of my Blog Posts, sign up to the email alert over in the right hand side bar of the page.

If you would like to join my Team or become one of my Discount Shoppers, you can message me on my Facebook Page at www.facebook.com/craftykarendesigns or via the Contact Me box below this Blog.

If you are interested in taking part in some challenges and having crafty chats with like minded people and a bit of a laugh, pop over to Craft and Banter on Facebook (link in the side bar). This is a new group that some crafty friends and I are trying to get up and running and we would love your company.

Happy Crafting,


Karen X


Product List

Awash in Beauty Easel Block Card - Pootlers Blog Hop

 Hi Everyone,


I've made this fun fold card for the Pootlers Blog Hop, I wanted to show off this gorgeous designer series paper without doing much to it, it speaks for itself.  I've teamed it with Gold Metallic Speciality Paper and the Gingham Embossing Folder and picked out the Balmy Blue in the dsp for the card base.  I've made lots of easel cards in the past but this is the first one with the block at the base, I saw this one on Mixed Up Crafts so thought I'd give it a try.  Let me show you what I did.

Materials

2 pieces of Balmy Blue card stock 6" x 6", 1 piece 6" x 8 1/2"
1 piece of gold paper 5 3/4" square, 2 pieces 2 3/4" x 5 3/4", 3 pieces 3/4" x 5 3/4"
1 piece of dsp 5 1/2" square
2 pieces of basic white card 2 1/2" x 5 1/2", 3 pieces 1/2" x 5 1/2"
Gingham Embossing Folder
Stampin' Cut & Emboss Machine
Gold Shimmer Ribbon
Versamark
Heat Tool
Metallics Embossing Powder
Pansy Patch stamp set
Double Oval Punch
Brushed Brass Butterflies
Trimmer
Simply Scored
Bone Folder
Take Your Pick
Multipurpose adhesive
Dimensionals
Tear and Tape

Instructions

On the long side score the 6" x 8 1/2" piece at 1", 2", 3", 4" and 8" and fold and burnish. Score one of the 6" x 6" pieces at 3" and fold and burnish.

The 4 score lines at one end form the block, so roll them up until you form the block and add adhesive to the last section and adhere in place to form the square block (see picture).  Fold the 1/2" tab at the other end in towards the block and add adhesive, add one end of the folded 6" x 6" piece to this tab to form the easel.


Run one of the 2 1/2" pieces of white card and all 3 of the 1/2" pieces through the machine in the Gingham Embossing Folder.


Add the gold foil mats to 3 of the sides of the block and the two inside sections of the card. Then add the embossed mats to these. Add the remaining piece of white to the back section of the easel to write your message.

Add the large square of gold foil to the remaining piece of balmy blue and then add the dsp.  Put adhesive on the side of the easel which is folded forward and then add this piece to that taking care to line up the edges.

Stamp a sentiment on a scrap of white using Versamark and then sprinkle on the embossing powder and set with the Heat Tool. Punch out with the Double Oval Punch and layer up on  the scalloped blue one.

Cut a small piece of the ribbon which is about 1" longer than the widest part of the sentiment layers and flag both ends (see picture), add this to the back of the oval using Tear and Tape and then add the sentiment to the card front with dimensionals.  Sprinkle some pretty butterflies to complete the card.


I do hope that you like my card, please pop over and see what my Team Mates have made too, you are sure to be inspired.

You are invited to the Inlinkz link party!

Click here to enter

If you would like to see more of my Blog Posts, sign up to the email alert over in the right hand side bar of the page.

If you would like to join my Team or become one of my Discount Shoppers, you can message me on my Facebook Page at www.facebook.com/craftykarendesigns or via the Contact Me box below this Blog.

If you are interested in taking part in some challenges and having crafty chats with like minded people and a bit of a laugh, pop over to Craft and Banter on Facebook (link in the side bar). This is a new group that some crafty friends and I are trying to get up and running and we would love your company.

Happy Crafting,


Karen X


Product List